Mylar after two years of exposure

A few years back I picked up a heat-sealer and a supply of heavy-duty mylar pouches. The goal was to use them to store small first aid items in a protective package that would be impervious to dirt, moisture, etc. (Links are still good in that post, so if you want your own sealer and bags go hit those links.)

SO, I went through my extensive piles of first aid supplies and pulled out the basics, loaded them into a mylar bag, and sealed them up. This was, ostensibly, for me to basically throw under the seat in the vehicle.

At some point, I needed to clean out the accumulated detritus in the vehicle and loaded all the loose items that were kicking around (water bottles, pens, loose ammo, maps, e-tool, etc.) into a milk crate and kept that milk crate in the vehicle. One day, I needed to maximize the space in the vehicle so I pulled out the milk crate and tucked it away in a corner of the yard while I did what needed doing. And then forgot about it. That was two years ago.

So, I was straightening things up and found this mylar pouch of first aid supplies that had been sitting out in the elements – snow, rain,sun, heat, cold – for two years…completely unprotected. Seems like a good opportunity to see how it held up.

Two years in the sun, rain, snow, heat, and cold of Western Montana. Dusty, but otherwise undamaged.

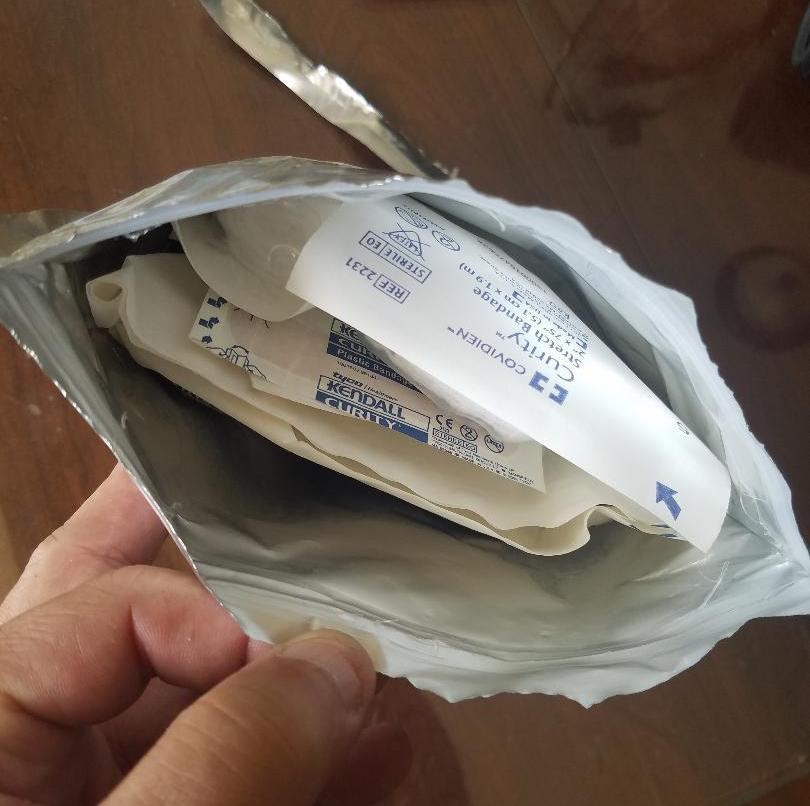
Tear it open and take a look inside. Contents appear to be undamaged and just fine.

Everything appears as good as it was when I packed it up two years prior.

Unfortunately, I loaned my heat sealer to someone last year and despite my occasional requests for it back they’ve not returned it, so unless they get a sudden dose of responsibility I’m probably going to have to order another one. I still have a goodly supply of pouches and the evidence seems to show that they are very good at protecting important items from the elements. In addition to the obvious things like a bit of first aid supplies, small objects that need to stay clean and dry would be suitable candidates….small electronics like radios and such spring to mind.

I rather like the convenience of having several of these pouches sitting in a bin in storage and I can just grab one and throw it in a pack or bag if I’m going somewhere. And when you buy the stuff in bulk like I do, it’s ridiculously cheap to put one of these together. Cheap enough to the point that I can just give them away to friends and like minded individuals, keep on e in every bag, stash a bunch at some offsite location, etc. Of course, if you’re willing to pop for the larger size pouches you can put together some extensive kits.

By the by, these pouches are the resealable kind…so once open, the contents can be put back inside and the bag ‘zipped’ closed. But if you really wanna go the suspender-n-belt route you could easily stuff a ziploc bag in there to perform the same function.

Goal 0 Extreme 350

I have a couple ‘battery in a box’ setups around the house. I have an ancient (pre-Y2K) ConSci powerpack that has, rather unbelievably, held up for the last twenty years. And, as of late, I picked up a battery jumpbox that ran an LED desk lamp for a week. That told me that as far as emergency lighting needs go: a) anything other than LED’s is a remarkably foolish choice and b) assuming six hours of use per night, I can light the house up for a month with a lamp and a charged battery. So, the logical conclusion was to get a couple lamps,a couple batteries, and keep them charged. This I have done.

Now, the emergency lights I use are from Goal 0. I have fabbed up my own in the past, and I’ll probably do that again, but Goal 0 had some nice, simple, daisy chainable lights. Goal 0 also makes various battery packs. I was gifted a dead one last week, along with a Goal 0 panel to charge it. And thus begins our tale.

So I was generously given a Goal Zero Extreme 350…a discontinued batterybox type of product. It featured Anderson power pole connectors, charging regulator, charging input, fuses, and a battery meter. Really, you could put together the exact same thing for less than what Goal 0 charges but some of us are not terribly handy with tools and prefer an out-of-the-box turnkey solution.

Anyway, this thing had sat in storage and was deader than Hillary Clintons presidential chances. I let it sit on the supplied charger for a couple days and got no joy at all. Clearly the long period of non-use, and slow discharge (because the battery meter is on all the time), led to the sealed lead-acid battery becoming unrecoverable.

But..I liked the other features. Perhaps Goal 0 has a replacement for this battery? Nope. And the replacement batteries they do sell are $$$. So….off to the itnernet. Which is where I found this – directions on DIYing a replacement battery off Amazon. Since my basis was $0 in this, I didn’t mind dropping the coin for a new AGM battery to replace the dead SLA battery. So, ran off to Amazon and ordered up the suggested battery which was an exact dimensional fit, gives me the advantage of AGM, and was an extra 5 amp/hour. Followed the instructions and – voila – brought it back to life. I’ve got my desk lamp hooked up to it to see how long it’ll run on a full charge, and then to see how long it takes to charge it using the panel. I’e no doubt this thing willrun the lamp for at least three or four days…and probably longer. It’ll give me one more self-contained lighting unit to distribute where needed next time the power goes out. And the price was right.

Adventures in food storage

You guys remember a few months back I posted about a guy who was crackin’ open some decades-old Mountain House and having himself a little taste test experience? Well, he’s at it again.

He’s got himself one of those buckets that claims to have X amount of days worth of food in it. Read it at his place…….

I’ve been ‘into’ food storage for twenty five years….and I’ve done tons of research on the subject, bought and tried all sortsa food, and created darn near Montana’s largest privately owned Safeway in my basement…..so I feel fairly qualified to say that this will end badly.

Here’s the thing: these types of kits are usually calorie-deficient, somewhat monotonous, and often not terribly appetizing. It is (in my opinion) a panacea to people who want to be prepared but don’t want to have a lifestyle – theyre for someone who just wants to make a quick online purchase, stuff it in the garage, and feel like they’re ready for the crash.

A guy I know was just telling me that he was thinking about purchasing such a kit ‘just in case’. I’m trying to steer him towards a more practical, albeit more expensive, route using regular off-the-shelf stuff from the supermarket.

You know who has this figured out? The Mormons. (No surprise, right?) These guys literally have graduate-level research labs working on just this sort of thing. And having done the research, they actually package and make available these storage-suitable foods. Go read their list of what you can get from them.  And they sell it cheap enough that even the most niggardly ‘poverty prepper’ can afford it.

I have a lot of freeze dried Mountain House here for my future needs. But it’s not my primary ‘go-to’ food in a crisis. What is? My stash of ‘everyday’ food. The pasta, rice, canned tomatoes, spices, cooking oil, canned and frozen meat, flour, cornmeal, canned and jarred vegetables, oatmeal, hash browns, etc. that I have in large quantity. All things I use everyday and all  things that store well.

But, to be fair, a ‘bucket’ as mentioned at the opening of this post, makes it’s strength on the portability and convenience. In theory, you can run out the door with it and know you’re not gonna starve for a month. Perhaps. I’ve taken it a step further and just put together my own ‘bucket’ for those moments when you need to run out the door…specifically, a couple 15-gallon ‘blue barrels’ loaded with freeze drieds.

Reviewing what I have in storage, post-apocalyptic meal planning would look something like this: pancakes, hash browns, scrambled eggs, biscuits, pork chops, strawberries, orange drink, milk, and oatmeal. And thats just breakfast. Lunch and dinner would be equally as broad, equally as long-term, and equally as tasty.

Just write a list of everything you’ve eaten in the last week and figure out if you could recreate it using foods that store well in the long-term. Then go buy those foods. Then when the wheels fly off civilization you’ll be eating pretty much just as well as you were beforehand. Heck, considering the erratic and horrible diet I live on now, I’ll actually eat better after the apocalypse.

My long winded point, though, is this – before you get lured into these sorts of ‘bucket kits’ do some research on calories, taste, and texture, and then see if you can’t put together something on your own. When the apocalypse hits, I have no intention of eating 3/4 of a cup of cheesey broccoli soup every lunchtime for thirty days. Given the stress and physical strain that the end of the world will put you under, I think you’re going to want more ‘stick to your ribs’ fare.

Conclusion: ‘Food buckets’, like first-aid kits, are better for your needs when you assemble your own.


Link – https://intershelter.com/

These look very interesting. A couple things jump out at me. First, these seem like they’d be an interesting way to dump a small, easily concealed ‘cabin’ on a piece of remote property. Additionally, since they’re pretty much a ‘kit house’ I’d imagine you can knock it down and transport it if you needed to.

Not sure how much stress the design can handle, but it’d be interesting to use it as a ‘form’ and shotcrete over it or something similar. Byrying it seems unwiae but it looks like it wouldn’t take much to build up some railroad tie berms around three sides of it to make it all but invisible.

Pricing seems reasonable…for about seven grand you can get something that beats being homeless. If a fella had a piece of undeveloped property out in the sticks, this might make a nice weekend cabin sort of thing to hunker down in while you build the primary residence.

Also might make for an interesting ‘dual purpose’ building…plant int on your property as a shed or storage building that can be refitted as temporary housing in a crisis.

As I said, very interesting. I’d like to see one up close.

More LED lighting experimenting

So, if you recall, late last year I had a post up about picking up one of those handy-dandy battery jump-packs at CostCo. They’re a fairly simple, though not perfect, solution for people who are just not inclined, mechanically or motivationally, to whip up their own battery-in-a-box.

After that, I got the curious interest of wondering how long my converted DC LED desk lamp would run on the jump-pack before failing. (The short answer was at least a week 24/7, which, at 6 hours per evening comes out to a freakin’ month of light. Probably more…I quit the program after a week figuring I had enough info.)

It was, to me, a very useful experiment and showed the potential for some tremendous utility from those devices in case of emergency. But…it’s very localized lighting. Its a desk lamp, after all. Which means it’s ‘area of effect’ in terms of illumination isn’t very large. So…what if……….

Was up at CostCo and they have a 4′ LED shoplight that looks similar to the old-style fluorescent shop lights we’re all familiar with. Now, lets state right up front that these were not the really high output LED worklights that are avaialble…for $25 the box says you get about 4000 lumens. Ok, thats fine…what I’m after is the ability to light up a room in a manner that looks virtually identical to what it looks like when the power is on, and not like someone pulled the housing off a MagLight and set it up on a file cabinet in the corner.

Here’s the rub…its set up for AC current, which means that I have to plug it into the built-in inverter on the battery pack. Problem is, the LEDs are DC to begin with…. converting DC (battery) to AC(fixture) to DC (LEDs), as I understand it, isn’t as efficient as if it was just straight DC to begin with. Fortunately, the internet is not without a supply of posts and DIY from people who wanted to do exactly that…. so, I may dig out my snips and electrical tape and see what I can do. But, for now, I’m curious to see how long it’ll run off the battery pack.

I still have these guys sitting here and it would be interesting to put them together to form a self-contained emergency backup lighting system for the storage area where all the emergency gear is.

I have no illusion this thing will run as long as the desk lamp did, but that lamp ran over 168 hours…this thing, on the ther hand, ran for three. Three. I suspect that the actual runtime would be several orders of magnitude longer if it were DC-DC. So….some tinkering is in order.

Watergun: parts arrival

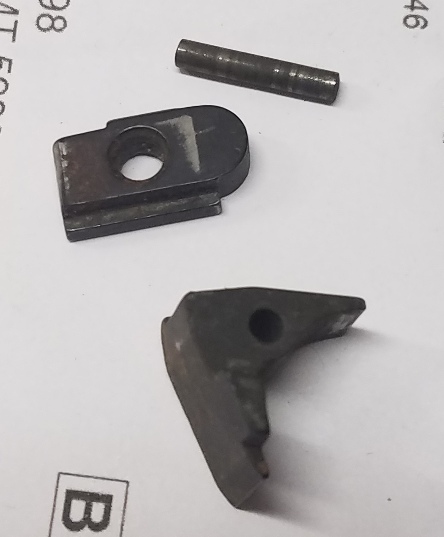
As best I can tell, the missing parts to get the gun ‘shootable’ were a sear, sear pin, and firing pin retaining plate. In other words, these:

I am not a gunsmith by any stretch of the imagination…thats one of the reasons I shoot Glocks – you don’t ‘smith them, you just swap parts. At this point it looks like nothing needs fitting, which is good. But..the proof is in the function. We’ll get to that later. Alright…lets grab a punch, YouTube some disassembly/assembly videos, and get crackin’.

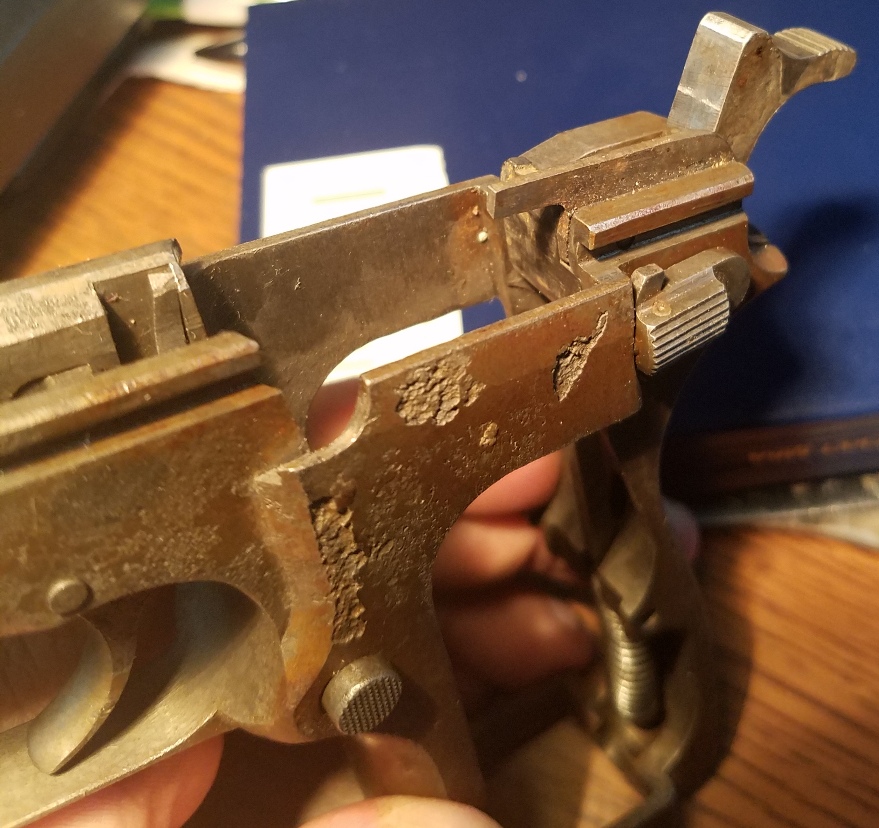
And once thats done…lets hand-cycle it, check the safety and trigger, and just generally play with it. It may look like the slide is a bit stiff but whats actually happening is that I’m trying to rack the slide without moving the gun or my hands out of the frame. Think its easy? Try it sometime.

Yeah, that rear sight is flopping around like Obama on a foreign policy question….but that’s a low priority at the moment. Next step is to take it to the range, tie it down, put a string to the trigger, and shoot the bloody thing.

And the sharp eyed viewer will notice that someone took the magazine safety out. Well, not really….it appears someone welded it to the trigger to deactivate it. :::SMH::: Whatever. Shooting this weekend. Hopefully the slide won’t go sailing through my brainpan.

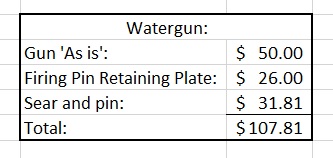
For those keeping track:

Assuming everything works, and nothing cracks/breaks/explodes/flies off, I’ll send it down the valley for a coating of some kind and then, as the years go by, slowly start replacing parts with premium parts. Kinda make a sweet custom gun with a crappy, but interesting, finish. I’m pleased with how quickly this is coming together. :::Knocksonwood:::

Flare for the dramatic

,Rawles mentioned the a supplier for 26.5mm flares the other day.

Years back, Sportsmans Guide had a deal on genuine HK21A flare guns. As I recall, they were something like thirtyfive bucks or so and I bought a few. At the time there was a goodly amount of 26.5mm Czech flares on the market (26mm will work also). I wound up with quite a variety of projectiles and smoke. Hey, why not? They were cheap(ish) and definitely fun to play with.

Practical? Mmmmm….not sure. But..here’s where they shine – 26.5mm flares are far more…substantial..for your perimeter tripflare warning systems than those rinkydink 12 ga. Olin flares. A quick trip through the plumbing section of Home Depot gets you pretty much everything you need to build a tripflare warning system.

For the more DIY minded, I recall reading a how-to somewhere on the internet about nailing a rat trap to stake, and then attaching the pull chain off some of those Skyblazer flares to the trap bar. Set the trap, it gets triggered, bar snaps down pulling the chain and igniting the flare. Clever.

Of course, thinking about that sort of thing led me down the rabbit hole to how to make other perimeter warning devices using mousetraps. Interesting stuff.


Remember: primers are dangerous and they might ignite things you didn’t want to ignite that were in close proximity to them. So..be careful. Wink, wink, nudge, nudge.

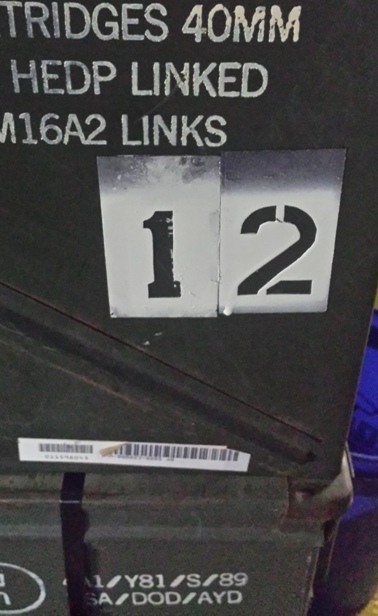
Magnetic stencils

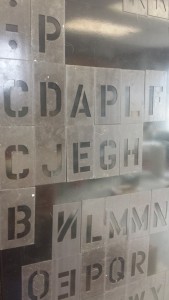
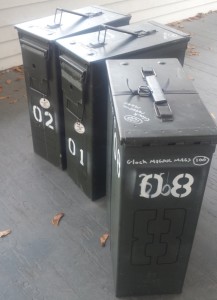
Someone asked about the stencils I was using to mark up the ammo cans and I realized that the post I had about them from years ago apparently got lost in the server migration a few years back. So, let’s rehash it.

20161204_124944

First, this isn’t my idea. Someone told me about it and it seemed like a good idea. I take no credit for it.

Required materials:

Take your stencil, square it on the magnetic business card, trace the outline of the stencil with the Sharpie, and then carefully cut the marked off areas out of the magnetic business card using your xacto. When youre done you have magnetic stencils that are perfect for marking up ammo cans. Just slap ’em on the ammo can and they stay in place all on their own. How cool is that? Slap ’em on the side of the can, give ’em a blast of spray paint, peel ’em off. Voila!

20161206_154741Now, be smart…some letters are going to be needed more than others. Don’t just fab up 10 numbers, 26  letters, and think you’re done. For example, there are two ‘M’s in ‘ammo’, ‘9mm’ and that sort of thing.. And you probably want doubles on all your numbers unless you think you’re never going to need 11,22,33,44,etc.

being magnetic, these things are perfect for marking up ammo cans.

Article – Living in a steel box: are shipping containers really the future of housing?

It takes time to adjust to living inside a steel box. Timothy Ader did not, initially, like the idea of staying at Wenckehof, a student village in Amsterdam made up of 1,000 recycled shipping containers. But three years after moving in, he has no regrets.

“My first impression of the containers was, ‘It’s ghetto stuff – I’m not living there,’” recalls the 24-year-old. “But I started visiting a friend of mine living here and started to like the place. Then I moved in and I realised how good it was. I’m really comfortable in my container and I have a lot of space of my own. I wouldn’t want to live anywhere else in the world right now.”

The notion of living in a converted (or unconverted) storage container is nothing new…you drop into various preparedness forums and you’ll see posts that go way back on the topic. You’ll also see posts from folks who have made their own habitable/storage spaces out of used shipping containers.

The biggest contention on the issue of shipping containers as survivalist retreats is that it seems lotsa folks want to bury them, a’la Terminator 2, and they just ain’t built for that sort of thing. Sure, they stack, but thats because they sit on the corners which are built for just that sort of thing.

I live in a somewhat cold envrion…by the time you pad a shipping container with insulation and the other goodies necessary to handle -20 weather you’re probably better of building a ‘real’ structure. But…I think that fo their original purpose they are ideal. I could see dropping one on a couple concrete piers, and then building up a concrete or forced earth berm on three sides to conceal it and using it as storage at a retreat location. I often wonder if it would make sense to just crib it with lumber and encase the whole thing in a few inches of concrete and rebar, using the container, basically, as a form.

There’s a place down the road from here that sells ‘retired’ containers. They also have the short 20′ ones and those look terribly useful. A fella could probably, with the help of his buddies and a few jacks/winches, manhandle one of those wherever he needs it on his property..in the barn under the hay, in the falling-apart garage under a tarp, or even out in the thick brush, concealed by netting, paint, and timber.

Someday, if I ever get a place in the stick, I’ll probably have a container or two tucked away in some hidden location where I can keep gear, a vehicle, etc. But, in the meantime, the developments in the ‘normal’ communities regarding the development of container-housing construction will come in handy later on. ‘Zon has no shortage of material on the subject….


But by the time you finish framing, cutting out metal, etc, etc, you’re pretty much where you would have been if you had started with a regular cabin built from scratch. Why re-invent the wheel? Check out the military CHU if you want to see what mass-production can do to make a container livable. As expected, Wikipedia has some info on the subject as well. As I read it, the huge amount of containers available is because we import more crap from overseas than we send out…so there are plenty of containers to go around. Since I don’t see that changing any time soon, it makes sense to think of them as a handy resource. If nothing else, they can build a hellaciously cool perimeter wall if you backfill them.