Portable and potable

Have you ever watched a movie where the hero is off in some sort of arid environment and there’s that classic scene where he tilts the canteen to his lips, a single drop drips out, he looks disgustedly at the canteen, and then throws it away?Why would you do that? Just because you don’t have any water at that moment doesn’t mean you’re not going to come across some later. And if you do come across some, and drink your fill, how are you going to carry some of that water with you since you threw your canteen away?

I mention this because I posted earlier about those water pouches and the conversation developed into a discussion about various water portage options. I always keep one heavy-duty-plastic bottle of water in my Bag O’ Tricks(tm) because you never know when you’re gonna get stuck somewhere. (I also keep a couple small ‘lifeboat’ ration bars in there too. If I’m gonna be stuck somewhere I’m not gonna spend the time listening to my stomach growl.) But in addition to the plastic water botle, I also keep one of these guys rolled up and tucked away. Although I like the Platypus, I go with the Nalgene because the mouth of this bladder takes all Nalgene lid accessories, including this one which I highly recommend. Importantly, the Nalgene version has the wide mouth so you can fill this thing in a hurry and even throw in snow/ice if you have to. And..I can fill it from a questionable water source and be abble to fit a LifeStraw through the mouth of it.

I carry it in my bag because I simply cannot carry as much water with me as I would like….its heavy stuff. But I can keep a water container with me in my bag so that if I do run across a water source…a natural body of water, a hose bib, an unattended faucet, or that sort of thing, I can supplement what I have.

You might ask, since I’m already carrying a plastic bottle of water, why not refill that? If it wer eempty, I absolutely would…every chance I get. But in a crisis I want more water than just the one bottle’s worth…more is better in this case.

Your mileage may vary, of course, but if you’re going to carry around a  (insert acronym here) bag, you may as well take the two ounce weight penalty and have the option to carry around extra water when you come across the opportunity.

Plastic container prep

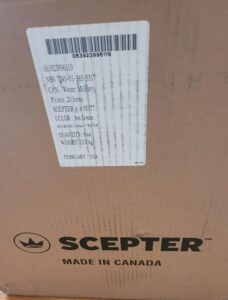
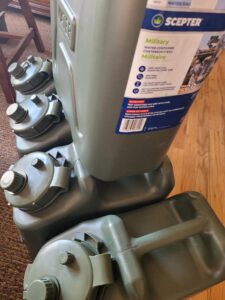
A few posts back I mentioned that I had bought a new bunch of Scepter water cans.

Any new plastic container is going to have ‘that plastic smell’. Also, you don’t know where that container has been or what its been exposed to in its time at the warehouse. So, the smart survivalist will clean these things out if for no other reason than to at least get rid of that unappealing strong plastic smell.

Ten bucks up at CostCo gets you about 14# of baking soda. You don’t need 14# of baking soda to wash out a water jug, but more is better, right? I err on the side of overkill, so I fill a gallon pitcher with hot water, dump in about a cup of baking soda, stir well and dump it into the water jug. Seal it up loosely so water can escape a bit and get the threads of the cap. Shake vigorously, shake some more, and then finally shake it vigorously.  I give it about 30 seconds of violent shaking so I can feel the water hitting all the sides of the jug. Don’t be gentle.

Now, if you’re just doing one jug, you can dump out the mix and then rinse the thing out thoroughly with cold water from a hose. But, since I’m doing more than one, I’ll dump the mix into the next jug and repeat the process. I’ll do this for two or three jugs and then use some fresh baking soda/water mix.

Keep in mind, when you dump the water/soda mix out of the jug it will leave traces of baking soda on the inside that will eventually dry to a powdery film. This is why the rinse with clear cold water afterwards.

By this method I either totally eliminate the plastic smell, or reduce it to virtually nothing. And, of course, I’ve now cleaned out the inside of the jug. If you’re a suspenders-and-a-belt guy you may want to disinfect or sterilize the jug afterwards. Thats pretty much the same process but using water/bleach instead of water/baking soda.

And, finally, when it’s time to fill these things you can add all sortsa ‘water preservers’ or bleach to promote storage life. Its my understanding that municipal water (“city water”) is fine to store right out of the tap since it has already been treated by the municipal water provider.

I should also point out that I do this for any large plastic container that I am storing something edible in. My buckets for rice, wheat, etc., also get this treatment. In that case it is imperative that you make sure the bucket is completely bone dry before you fill it with your food product. After cleaning I usually let the bucket/container sit in a dry place indoors for a few days to completely dry out.

Can I get away with not doing any of that and just fill the things up without going through that effort? Absolutely. But this is stuff you’re putting away for a rather dire circumstance. When that dire circumstance occurs (or is occurring) aren’t you going to want every confidence and advantage possible? Of course you will…so spend the ten minutes and do the work. Future you will thank you.


Scepter features

I have often said that there will be no prize handed out after the apocalypse to the person who survived using bargain basement or ‘repurposed’ gear. Whether you ride out the apocalypse with washed-out 2-liter pop bottles of water or you ride it out with expensive purpose built five-gallon jerry cans, the results, if you survive, are the same. No one is gonna say ‘wow, you were a better survivalist than this guy’. If all you can afford is 2-liter pop bottles thats one thing, but if you purposefully cheap out when you don’t have to…thats kinda handicapping yourself from the start.

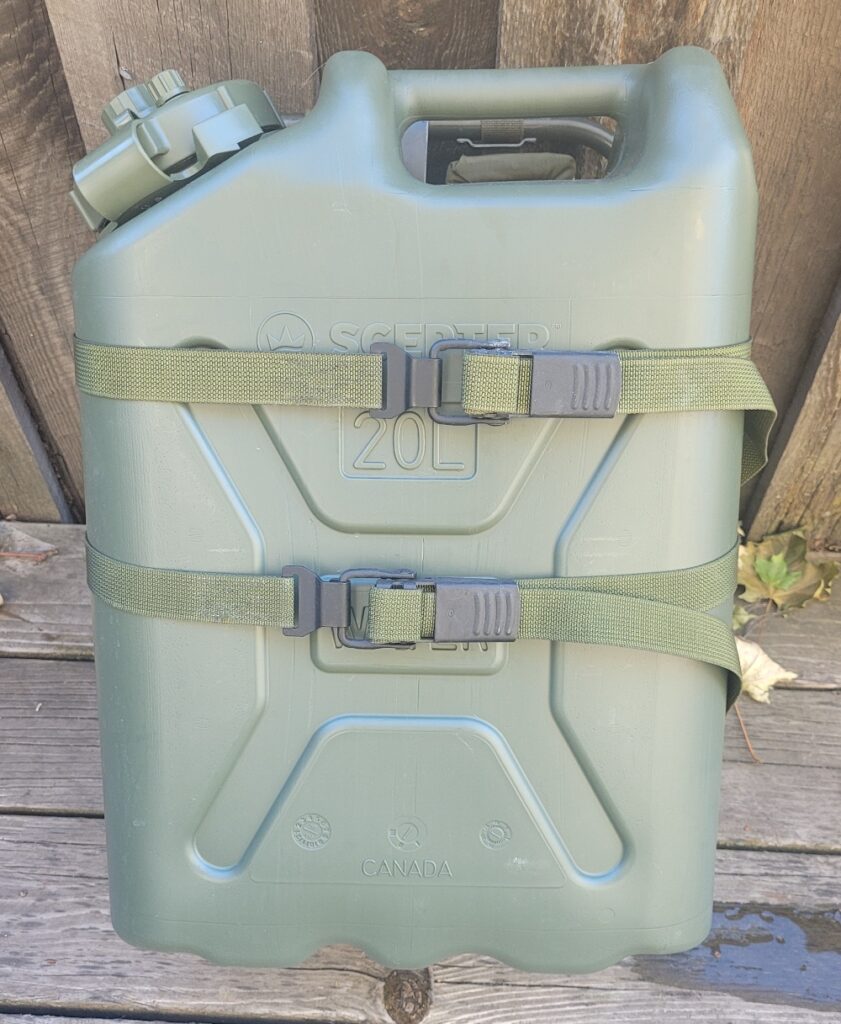
I mention this because I picked up ten new Scepter water jugs the other day and, lordy, they are not inexpensive. At the same time, the local Winco sells camping-style blue water cubes for 1/3 of what the Scepters cost. But, to me, in addition to the rather rugged build of the Scepters there are two other things that appeal to me – portability and adaptability.

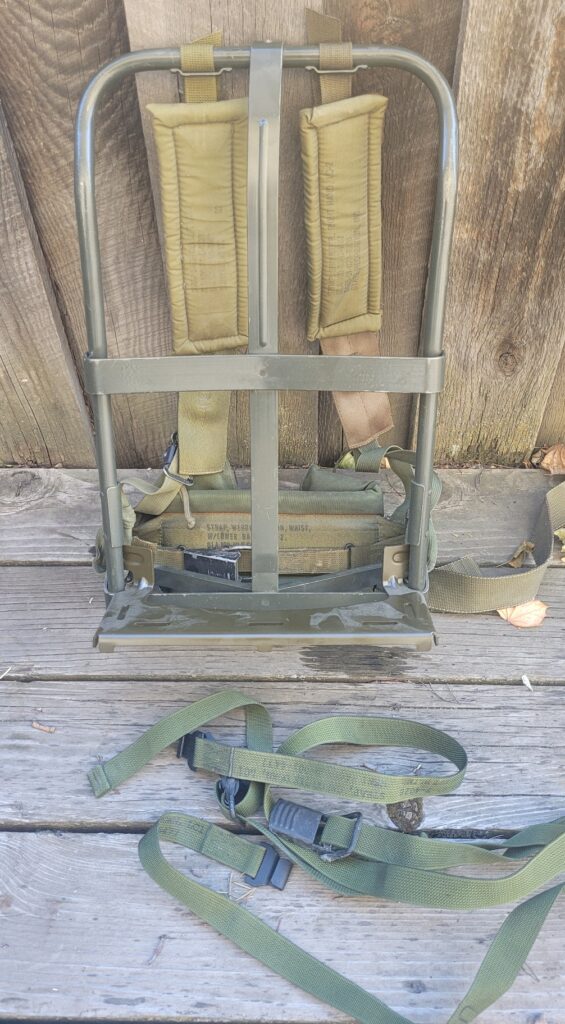
What you see here, my friends, are what we survivalists back in the day bought for our bugout kits – an ALICE pack and frame. Here we see just the frame. We also see, mounted on the bottom of the frame, a cargo shelf. We also see two military camming load straps.

Those military-style cans, like the Scepter, are made to fit on that pack cargo shelf. You secure them with the straps and you can now carry that 40# jug of water on your back. That cargo shelf also works for cases of ammo as well.

Another reason I prefer the military style water jugs is the super wide mouth on them. It makes filling and dumping easier , and it lets me reach in there to clean the darn things.

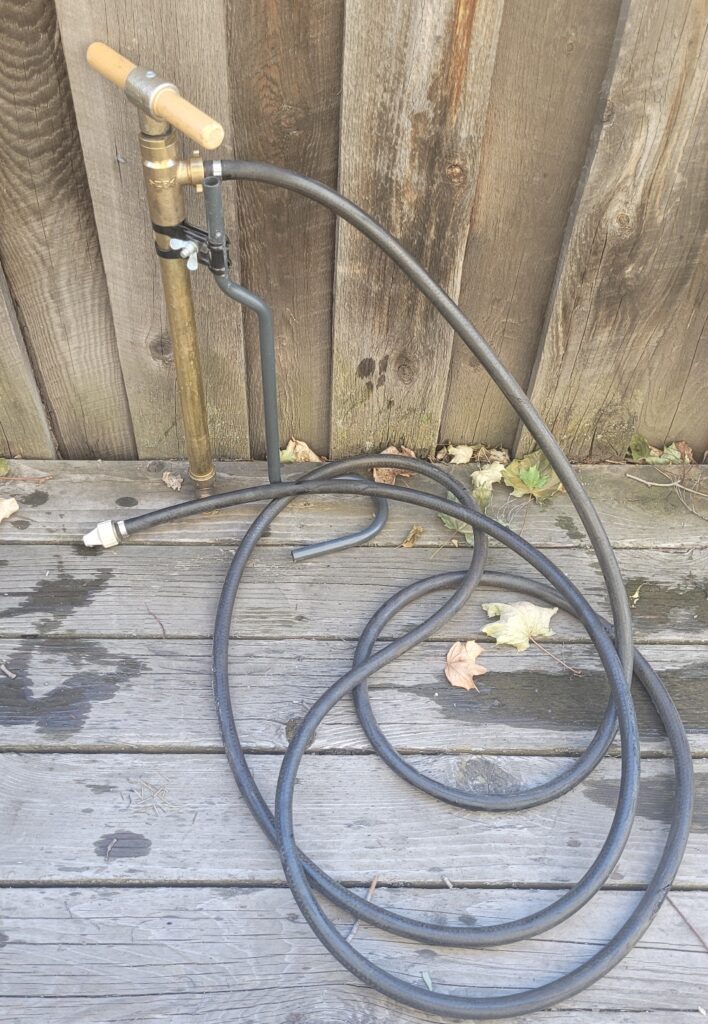
But that super wide mouth also has another advantage. Do you know what a stirrup pump is? It’s a small hand operated pump used in conjunction with a bucket of water to fight fires. They made zillions of these things in Britain during the Blitz for putting out fires after the bombing raids.

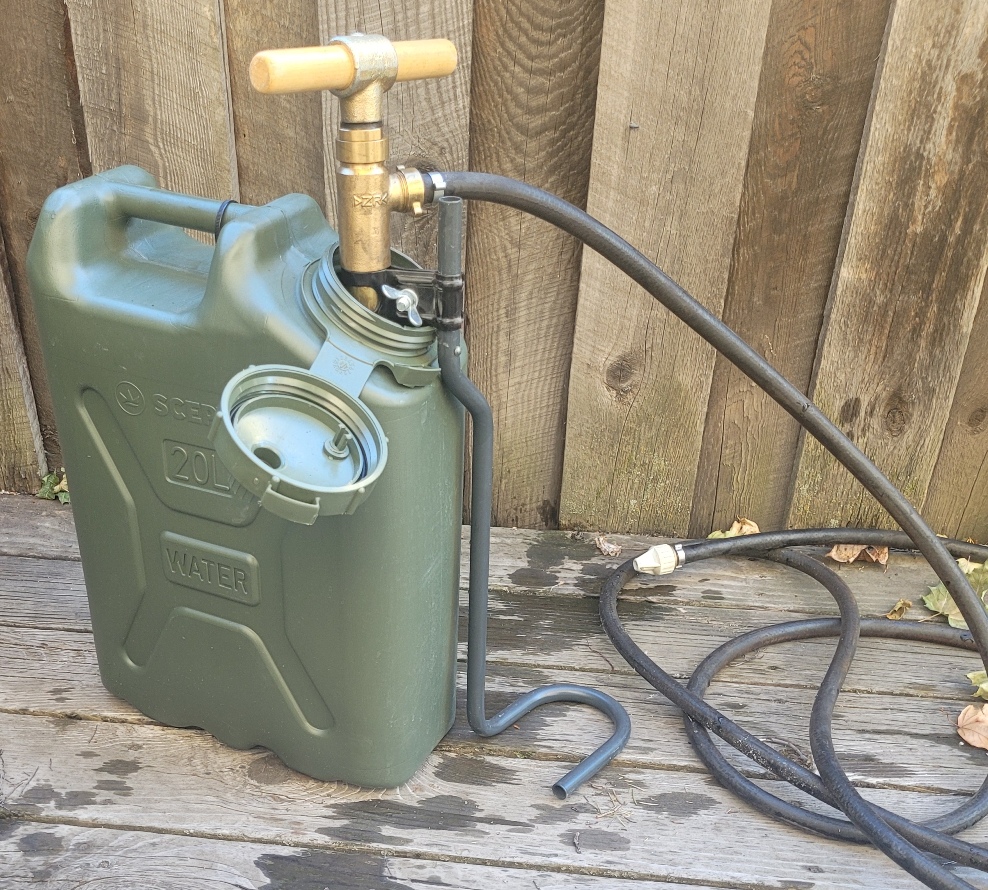
The brass part goes inside your water container, usually a bucket, and you stand on the u-shaped metal footrest. With your foot holding the pump in place, you work the handle up and down. The pump ejects water on both the downstroke and the upstroke. Range is about thirty feet or so. One person can use this but its best used as a team. Where does the jerry can come in? Glad you asked:

A handy way of being able to deal with small fires in a crisis. Just the ticket for small grass fires or wetting down an area ahead of a fire.
As I said, unfortunately that sort of utility doesn’t come cheap. But, for me, I’d rather spend the extra money and get something that I have confidence in and that has the portability and utility issue going for it.

On a side note, it was a nightmare getting that stupid pump. Original ones from the WW2 era are available on surplus sites and if you replace the hoses and gaskets they might work just fine. I found this thing in the catalog of a firefighting supply company and they had to import it from Germany. And I had to wait about a year and a few months to get it. Major pain in the ass, but a very nice product. Theres a blog post all about it here.

Scope arrival

Well, I guess I’m out of excuses for not getting this .338 Lapua project done.

The 16×56 optic (w. rings) arrived today. While I was tinkering, I swapped out the questionable Ruger factory stock for a Magpul PRS which seems like a good idea.

I picked a heck of a time to start shooting magnum rifle…my plans were never predicated around it, so while I have plenty of large rifle primers, my supply of large rifle magnum primers is only a brick or two. Then again, that would be 2000 rounds of .338 and I’m not sure anyone wants to subject themselves to that much fun.

I was tempted to drop this scope on the Barrett instead, but realistically the Barret is a potentially less accurate platform…long recoil and all. The Barret has a very particular purpose…it’s an anti-materiel gun that can, under certain circumstances, do double duty in another role. But it’s primarily for busting up stuff. The .338 Lapua is a bit easier to feed, slightly more portable, and is probably more accurate at range.

Anyway…that happened.

Scoping it out

Twenty years ago, I picked up a CZ .308 for my ‘long range’ gun. It’s been a wonderful rifle and my best day was a .512″ group at 200 yards. I put an IOR fixed 10x scope on it and have not regretted that choice. Why a fixed power? Honestly, because its just one less thing to go wrong. I figured 10x was about right for the distances I imagined I might need to shoot at.

A few years back, I wanted to bridge the gap between .308 ranges and .50 BMG ranges and decided to get a .338 Lapua. After some thought, I went with the Ruger Precision Rifle in .338 Lapua. And….its been sitting on my gun cabinet for the last several years. Why? Because putting a piece of appropriate glass on the thing was gonna cost as much as the bloody gun…and the gun wasn’t cheap to start with.

Eventually, I had to just bite the bullet and spend the moolah. Theyre a bit of an ‘off the beaten path’ brand, but I’ve been very pleased with my IOR fixed 10x and my IOR M2 4x. So, I decided that for my needs I wanted a fixed power scope again, but with a bit more magnification to go with the .338 Lapua’s extended range over the .308.

Do you know how hard it is to source decent fixed power scopes these days? Everything was either too much magnification (25x and up) or too little (4x, 6x, 10x). And, really, anything below 20x in a fixed power was a toughie. So…back to IOR. They had a 16×56 with the reticle (MP8) that I used on my .308. The 56mm objective is enormous but lets in plenty of light. I figure 16x is about the right magnification to cover the range of distances I’d be shooting the .338 at, so let’s get that puppy ordered. It’s a 35mm tube (light transmission, baby!) so rings aren’t just going to grow on trees…better order up a set of those too.

When it’s all said and done, it cost slightly more than the bloody rifle itself. But, at least I’ll be able to shoot the thing now. Pics when its all put together.

Twenty years of the Bag O’ Tricks

I was rereading some old posts and realized that it was just over twenty years ago I got the bag that I now use as my Bag O’ Tricks(tm). At the time, I opined that the build quality seemed very good and that time would tell in terms of resilience. Well, twenty years has come and gone (ah, youth….), and I’m still here and so is the bag. Both a little worse for the wear, but still capable of carrying on as needed.

The bag is Tactical Tailor’s Three Day Bag. TT has undergone some changes since then and this bag is one of their ‘legacy’ products. There’s a newer version, and maybe I’ll get one just to have an extra. (Interesting to note that my ODG color is not offered.)

How has the bag held up over these two decades? Well, in spots its a bit dirty but who cares about that? Gear is meant to be used, my friend. It has gone on hunting trips, airline flights, been bounced around in trucks, and carried by me almost every work day for the last twenty years. In fact, even though I am at work sitting at a desk staring at three monitors worth of spreadsheets it is sitting behind me in the corner with all my ‘just in case gear’.

In the two decades I have had exactly two problems with it…both were my fault. I got careless and caught a fastex buckle in a closing truck door and broke the buckle. Fortunately a replacement fastex buckle of appropriate size can be found easily. Other than that…this thing is fully intact and ready to roll. No stitching has come apart, no seams have torn, no zippers have failed… other than some dirt and grime it’s in almost perfect condition.

I know that I’m not alone in having a bag like this, full of items and gear that might come in handy in a crisis, among survivalists. Some are more discreet, some less. Over the years I can tell you that I have learned that there are some features or qualities that are very much worth having.

A good, rock-solid carry/drag handle on the top of the bag is a must. When that bag is wedged in a vehicle with all your other crap crammed against it, you want something where you can grab and yank as hard as you can and pull it free from the pile. There have been times where I’ve been out hunting and had to clip a carabiner to the handle to affix the bag to a length of paracord to haul it up a cliff. More often than not, I clip (with a carabiner) it to a tie down in the back of the truck to keep it from flying. And, speaking of flying, sometimes you need to wing that sucker up to or over something…and grabbing it by the handle and swinging it like a hammer is sometimes the best way to hit escape velocity.

One of the things I liked about my ancient Dana Design (now Mystery Ranch) pack was that every closure had a secondary method of securing it. Any zippered part had a strap or two going over it so that if the zipper failed you could use the strap to secure things..at least, thats what the guy who designed the bag told me when I bought it from him back in the ’90s. Keep an eye open for that sort of engineering.

While the pack has webbing to attach pockets, I’ve always tried to avoid adding stuff to the outside of the bag. Ideally, I like the bag to be narrower than my shoulders or hips so I can get through doorways and other spaces in a hurry.

Straps need to be at least double- or triple-stitched.

All these features come down to build quality. Every manufacturer makes an ‘assault pack’ or ‘three-day’ backpack and they all usually have the same features. What sets them apart is the build quality. Don’t be afraid to reinforce the gear yourself. When I was a kid I used to have some cheap Jansport (remember them?) backs and I’d reinforce the strap and webbing attachment points with a speed stitcher. That stitcher, by the way, should be in every survivalists tool cabinet….its a handy little geegaw.

The TT bag cost me $110 twenty years ago. The newer version is around a hundred bucks more but, jokes on them, my bag seems to be a buy-once-cry-once that will outlive me.

Kicking and screaming into the 21st century

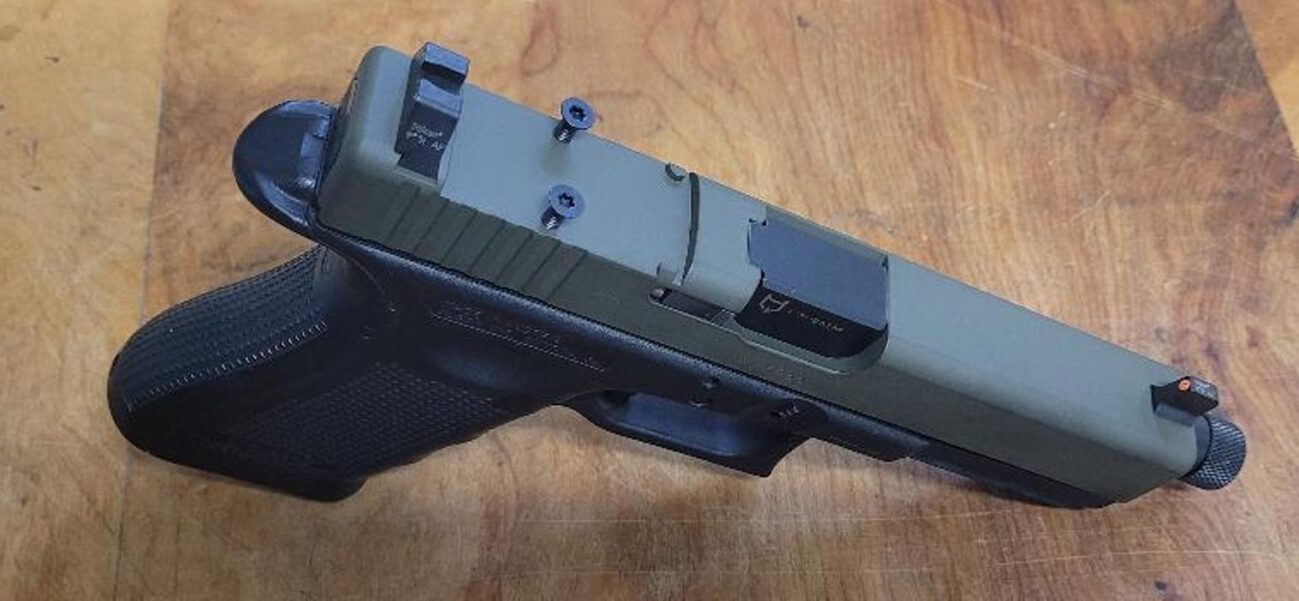
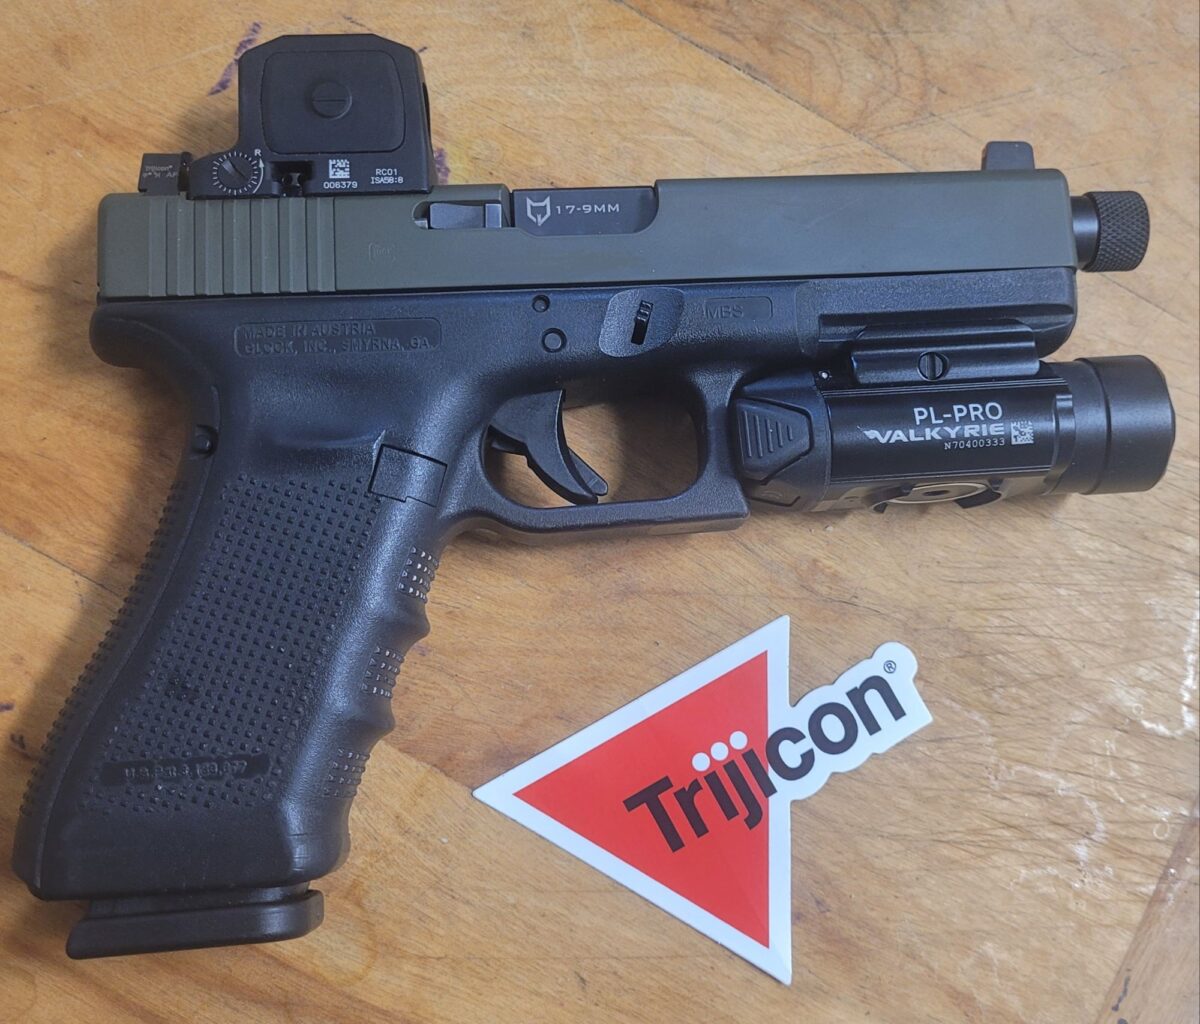
Remember that a while back I decided I was going to tweak out one of my Glocks? Swapped out for a threaded barrel, sent it offer some cerocoating and an RMR cut? Any of that ringing a bell?

Well today I finally got the RCR optic. So…we go from this:To this:

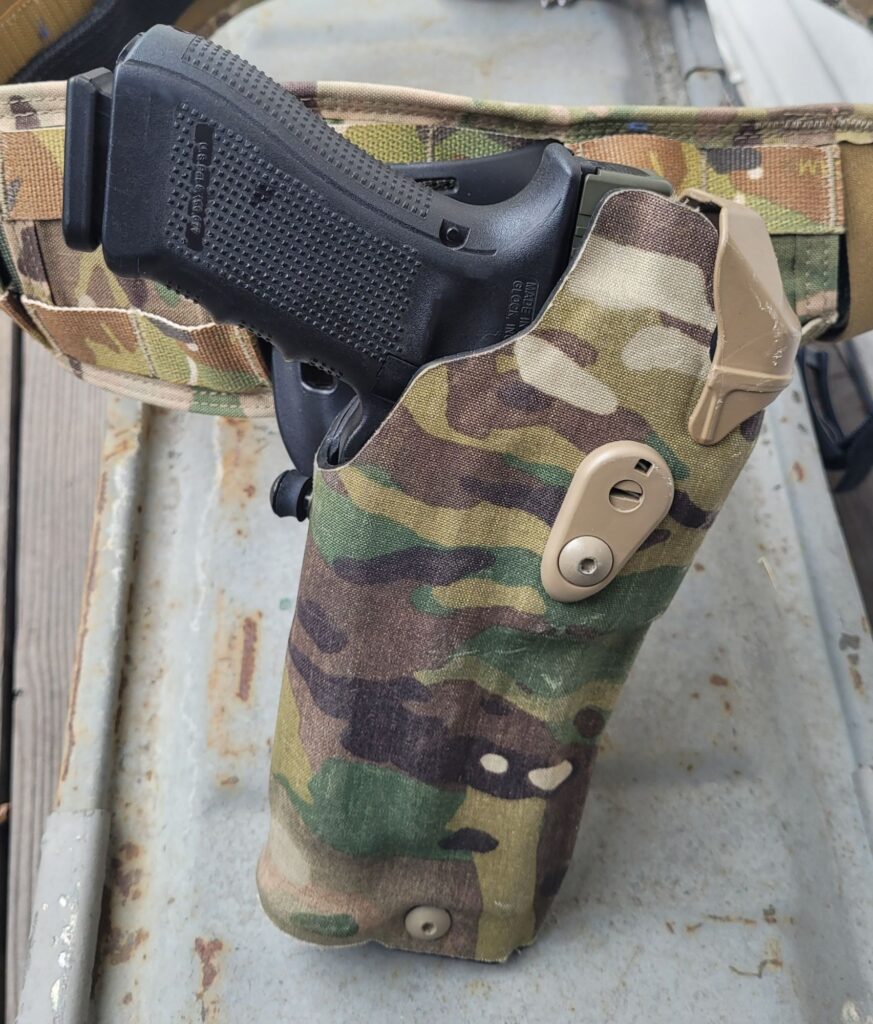
Still remaining, I need to put a nice not-too-light-not-too-creepy trigger in it. (Any suggestions, Tam?) And then…just shoot it until I’m happy with my proficiency. And my Safariland holster fits it, with optic and light, just perfectly….

By the by, if anyone is as big a gear queer as me and is curious, its a Viking Tactics Skirmish Belt with Cobra Belt. IFAK/TQ pouch is by Warrior Poet Supply. And the dual mag pouches are High Speed Gear Double Decker Tacos. Thats it…I didn’t want to clutter things up. This isn’t an end-of-the-world type of setup. I just wanted something for investigating the odd bump in the night or “‘who’s truck is that in the driveway?’ at 130am” sort of rig. Pistol, FAK, and 2 spare AR/Glock mags. Just need to add a flashlight pouch and I’d call it good.

I have almost no experience shooting red dots on pistol, so there’s going to be a bit of a learning curve but I’m optimistic that the benefits will be worth it. Specifically, shooting faster and with better accuracy at those speeds.


Glowie

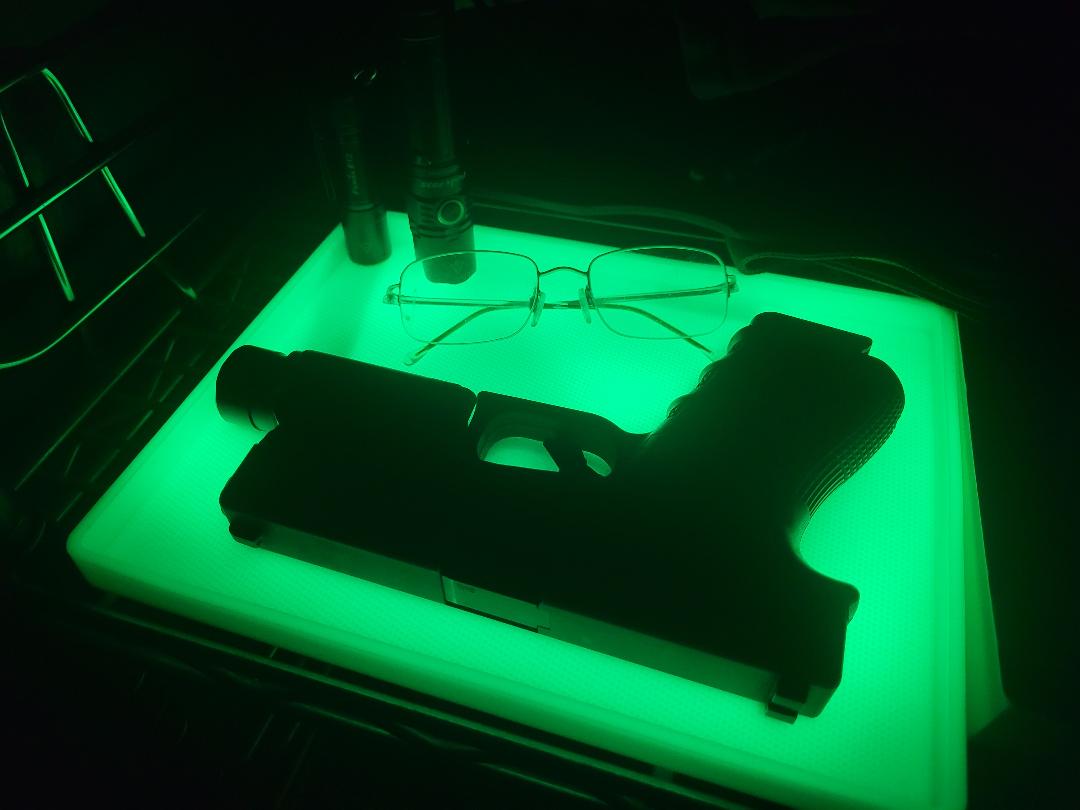
I mentioned a few posts back that I have a glow-in-the-dark (which I am just gonna simplify to ‘glowie’) tray that I keep my bedside gun on so I can find it in the dark. It’s a fairly simple thing…you have the lights on in the bedroom and when you turn off the light to go to bed, the glowie tray has absorbed enough light to glow gently through the night. As you know, most glowie stuff loses its brightness as the night wears on…thats fine because as the night goes on your night vision becomes better. As a result, a faintly glowing object is plenty bright to your just-woke-up-at-3am eyes. TPIWWP, so:

I got mine from the always interesting CountyComm website. I’ve been quite tickled with it and find it to be an excellent way to keep my important bump-in-the-night stuff in one place where I can find it easily.

Nice jugs

Remember kids: guns are the sexy part of survivalism. There’s still a lot of other stuff involved that isnt nearly as fun or sexy. Case in point:


One

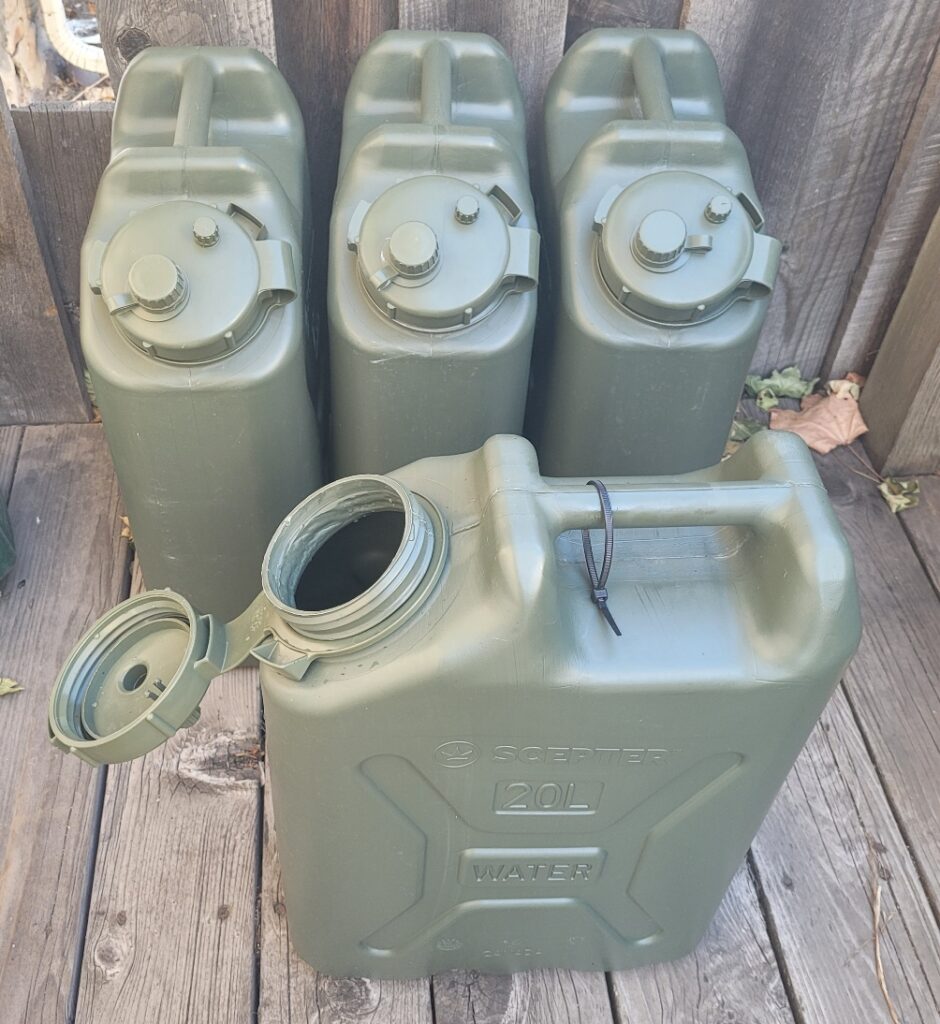
One of Canada’s few leading exports that isn’t toxic… (Canaduh is North America’s leading exporter of asbestos, acid rain, and Biebers.) The Scepter cans have a decent reputation and for water storage I rather like them. I don’t like them for fuel storage but then again I am not a fan of any plastic fuel container. When it comes to fuel, it’s Wavian/Valpro or nothing.

Anyway, I was thinking that it was time to replace my ancient surplus British water cans that I bought about 15 years ago. Or, at least retire them to secondary status. The thing I like about these Scepter cans is the enormous mouth on them. It’s large enough that  I can fit the end of a stirrup pump in there and have five-gallons of water for firefighting anywhere I can haul this on an ALICE frame. And, of course, the large  mouth makes it easier to get in there and clean.

I’ll rinse these out with hot water and dish detergent, and then it’s a fillup of clean water and baking soda to eliminate that annoying plastic smell. Then it’s time to fill them, hang them from the rafters with some newsprint on the floor below them, and check on them the next day for leaks. (You do always check your liquid containers for leaks before you commit to using them, don’t you?)

These cans aren’t cheap. I can get cheaper ones from Winco that will probably do just as good a job sitting on a shelf in my basement. But the apocalypse doesn’t always look like a simple trip to my safe, secure, well-lit, temperate basement. Sometimes it looks like heaving 40# cans of water into the back of a truck and bouncing them down a fire road as the bang up and jostle with other gear. Thats what I’m paying the extra for…survivability. Its a virtual certainty these will sit on the shelf in the basement until such time as I need them and their contents….and any reasonably well made plastic water container will work for that. But for that (waitforit) dark and stormy night at 3am where we’re tossing ammo, water, fuel, packs, and food in the back of a truck with the goal of getting outta here now now now….well, thats where the extra money is going.