
Tag Archives: gear
Quiet weekend stuff
It’s always interesting to watch the pricing on bargains suddenly go wonky. Last week I posted about the LifeStraws being $15.99 and quite a few people (myself included) jumped in there and picked up a few. Or, in some cases, more than a few.
Why would I mention a bargain on a cool piece of gear and NOT get a bunch for myself?
Sadly, I just checked the link and they’re back up to twenty bucks each. Bummer. Gotta strike while the iron is hot.
Same story on the OD hooded space blankets. They were $10.01 for a brief time and now they’re back up to $20. Hopefully, everyone who wanted one managed to get in there and snag a couple at the $10 price.
And speaking of things to put away for that rainy day, I decided that $2.15 was as good as its gonna get, and with us being slightly ahead on the gas budget this month, so I went ahead and have the extra fuel cans filled. Those are the lovely ‘Euro/NATO-style’ cans that I got from Lexington Container a couple years back. Don’t be tempted to buy the ones you see in Sportsmans Guide and a few other places…those are the cheapo Chinese cans and they are worthless. Yes, these cans are going to be expensive at around $50 ea (plus shipping) but when it’s 2am, pouring rain, and you’re on the side of the road hoping to outrun whatever it is that’s got you running, you’ll think that fifty bucks is a bargain to have five-gallons of fuel perfectly preserved and ready to go.
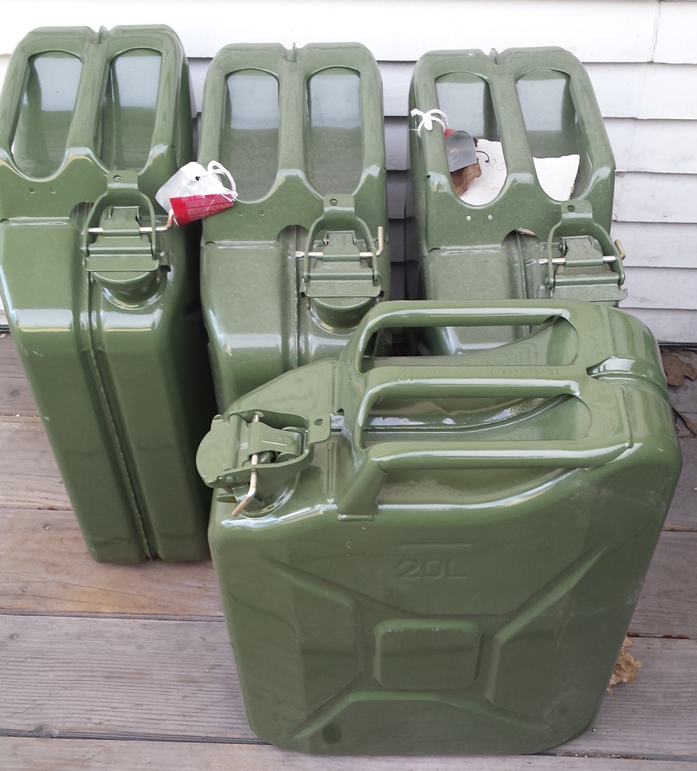 And, of course, each one of those cans represents x amount of hours of electricity courtesy of the generator. And electricity means hot water, hot food, lighting, communications, furnace blowers, etc….in short, those cans hold civilization. (Which sorta explains those Mad Max movies)
So, a somewhat productive last couple of days…picked up some extra water filters, filled some gas cans, did some grocery shopping. The weather has gotten nicer here so I expect I’ll be doing some spring cleaning and organizing shortly.
Lifestraws on Amazon for $16
Hmmm…I was trolling around Amazon looking at my Wish List and noticed that the Lifestraws, which are usually a good deal when on sale at $20 ea, are down to $15.99 each.A quick search shows that even when you buy them in packages of 10 you’re still looking at around $17-18 each. This is pretty much the cheapest I’ve ever seen ’em at.
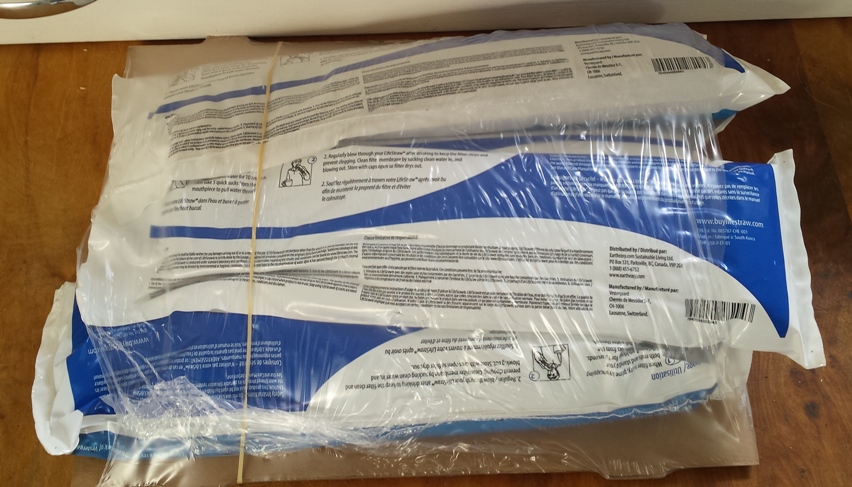
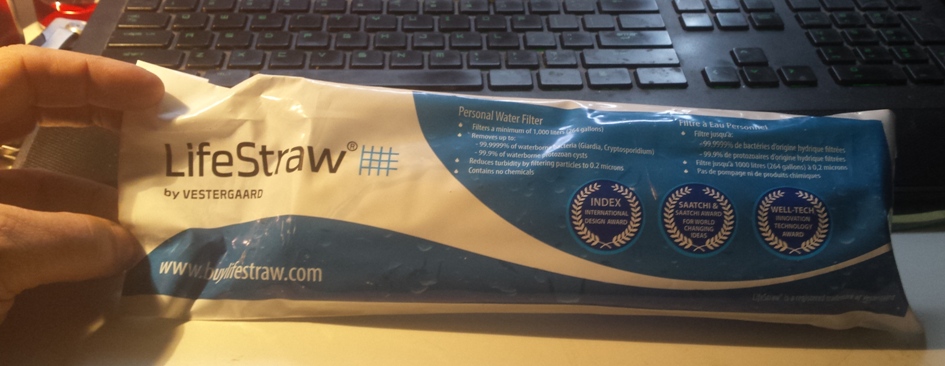 I’ve been liking these for keeping in emergency bags, in the truck bag, etc, etc. Individually sealed and cheap enough to buy a half dozen at a time. They’re rated for around 264 gallons of water, which, at three gallons per day, means that you could, theoretically, use it for almost 90 days. I’ll settle for a long weekend. At that price I’ll just throw it away after one crisis and have a new, sealed one for the next. And when you’re in the grips of water-borne digestive distress you’re gonna think “Man, it’d be worth sixteen bucks to not have to spend all day sprinting to the bathroom.”
While supplies last……
Those OD space blankets are back at $10.01
Quite a few people managed to snag some of the OD space blankets at the $10.01 price before weird pricing algorithms started jerking the price up. Well, it appears theyre back at the older $10.01 price…for now. So if you missed out last time, here’s another chance. The price in the link below says, at the moment, $18 but click on the link and follow it to Amazon and the OD version is $10.01…for now. From the original post:
The hooded, pocketed, olive-drab, “blanket” has been rather heavily discounted at Amazon. Knocked down from $18 to $10. Get ’em while they’re cheap. Excellent for use as intended, but also good for expedient waterproof overhead cover, dry spot to sit your ass, etc, etc. Far superior than those stupid, flimsy mylar foil sheets. Heres the link:
Gear – Outdoor Research (OR) rain & sun hats
Many years ago I got turned on to the Outdoor Research (OR) line of rain hats. They were basically big GoreTex boonie hats. What was appealing to me was that they were available in somewhat military colors (forest green), were waterproof, and could be crushed into a small baseball-sized bundle that could be stuffed in a bag or BDU pocket. I bought a few of them and when they made a multicam versionI bought that too. I’ve found them to be excellent for their intended purpose.
I spent a week in Puerto Rico last month. While the rain hat was useful for those days when the rain blew in off the ocean, most of the time was bright sun and clear days. Unfortunately, I had no suitable hat for the occasion. I decided that when I got back to Montana I would order up a suitable hat for those sunny days.
As it turns out, Outdoor Research makes a sun hat that is basically a non-rain version of the rain hat I love so much. ( Helios Sun Hat, Multicam)
The main differences between the sun hat and the rain hat, obviously, are construction. The rain hat uses different materials with an eye towards waterproofing. The sun hat is geared towards being lightweight and providing shade. Could the rain hat be used to shade your head and face? Absolutely, but if its suny and hot enough to need to do that then its also sunny and hot enough that the hat will make you sweat like a hooker in church.
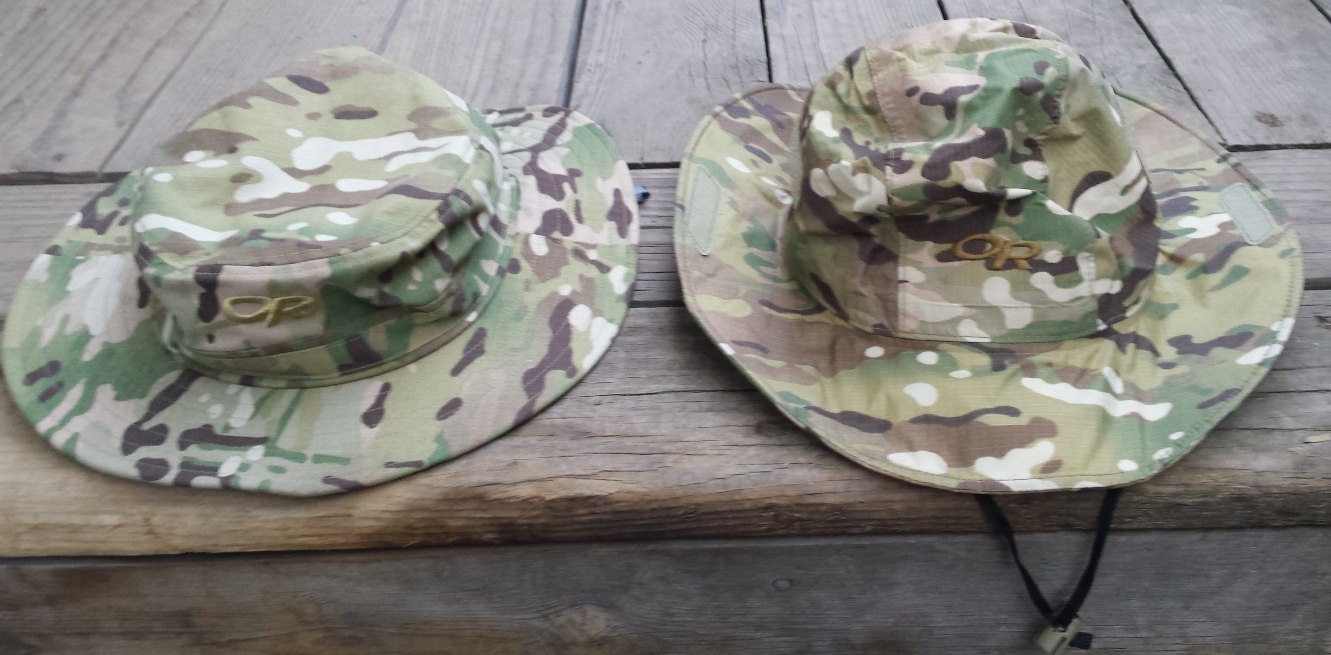
(L.) Sun hat, (R.) Rain hat
I suppose that you could pick up a ten dollar no-name boonie hat somewhere and be set for the sunny outdoors….thats what I did for a number of years. I had some woodland boonie hat that I could drag through a creek and plop on my head to keep me cool during a day of fishing, etc. But..now that Im a bit older…I like nicer things, and a lot of my newer gear is moving in the direction of multicam, soooo…….
The rain hat, though, I highly recommend. I actually recommend both hats but folks are more likely to cheap out on the sun hat and thats fine. But the rain hat…you wanna spend the extra bucks there and get a nice one like this.
First aid kit foibles
Years back,I used to have a bicycle that would, at irregular intervals, try and kill me by locking up the chain for no particular reason. I eventually got a newer, better, bicycle but the old Death Machine taught me to keep a first aid kit handy. On my bike I have one of these mounted. I find it very useful, and keep my first aid kit in there. The first aid kit is one of these (Maxpedition FR-1 Pouch
) loaded with what I feel is necessary gear. Now, if you’re keeping track, that is a first aid kit contained in a cordura pouch, which is itself contained within a cordura bicycle bag. What could go wrong?
Well, here’s the lesson for today… I left my bike chained up in the yard over the winter. As a result, the rain and snowmelt made its way through the bicycle bag and through the first aid pouch. Check this out:
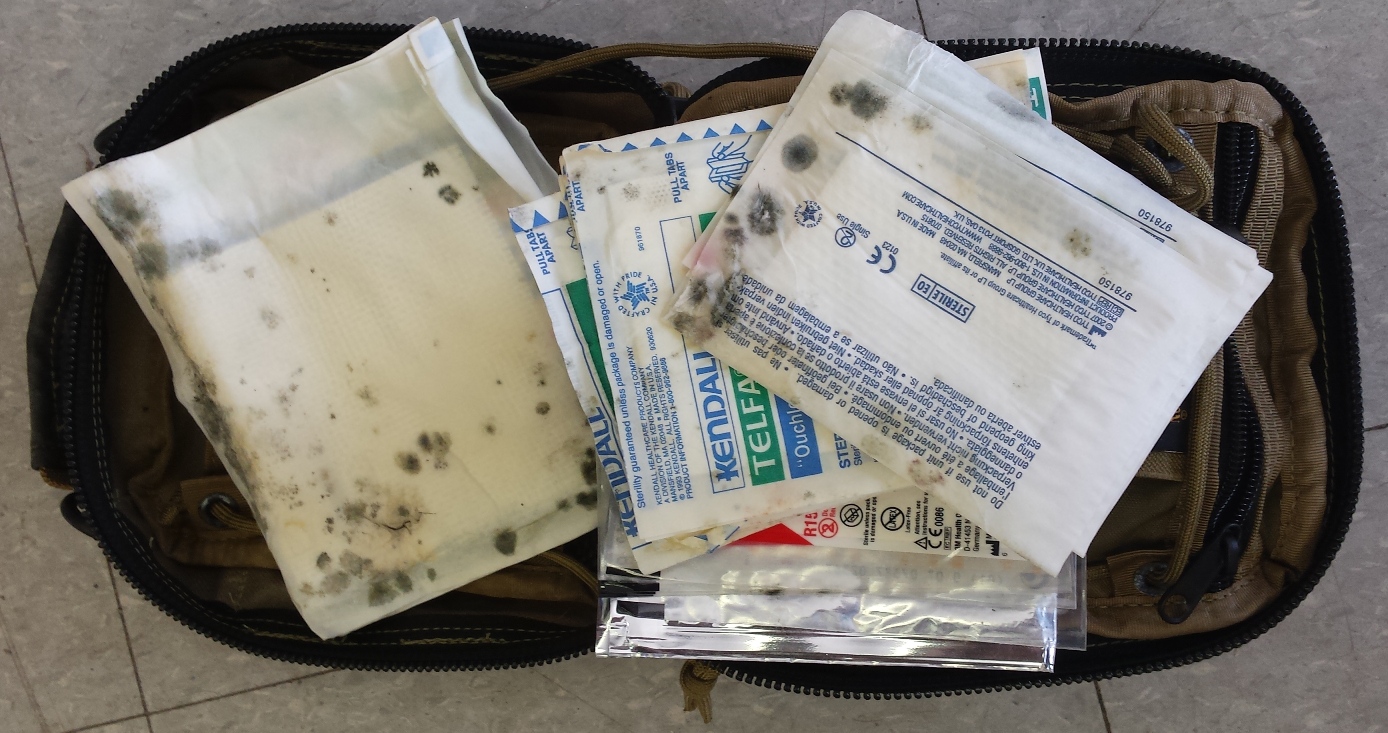 Thats not dirt, kids….thats mold. Most first aid stuff is packaged in sterilized paper envelopes and those are less waterproof. So, virtually everything was moist/damp/moldy and had to be discarded. However, some things were not damaged. Observe:
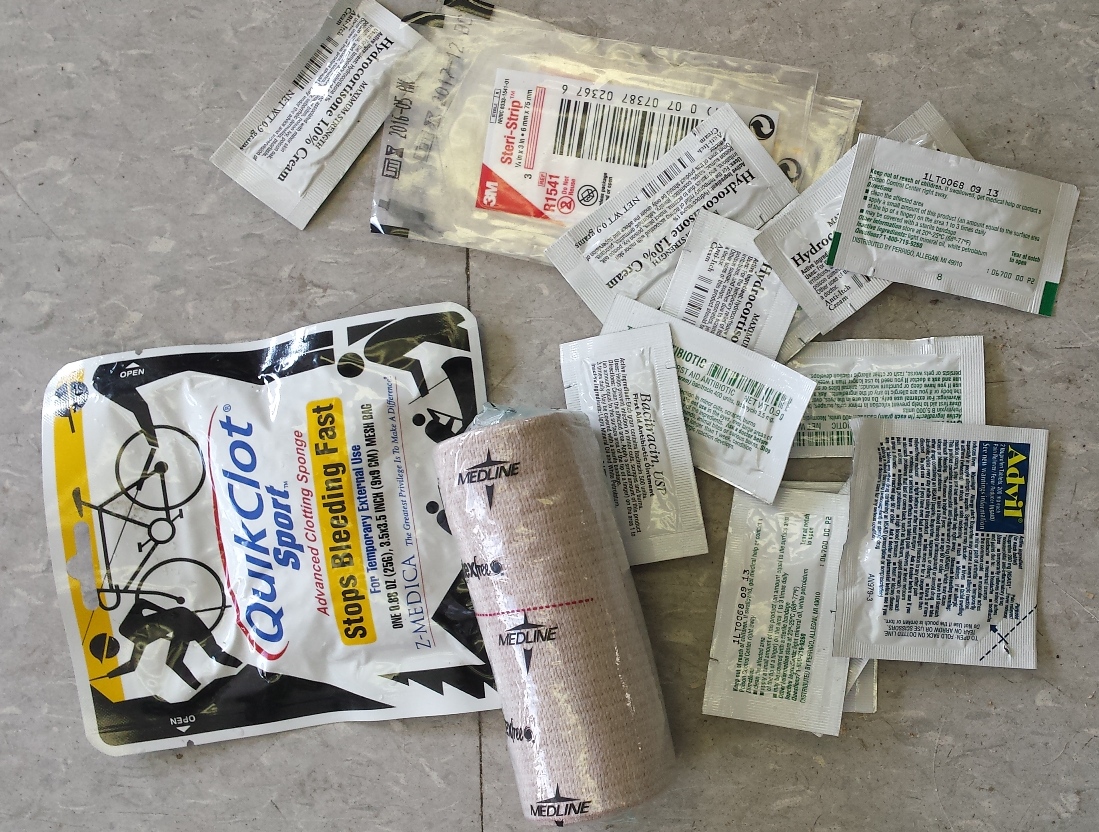 Basically, anything packed in foil or sealed in plastic weathered it just fine.
So, by now, you’re thinking “No problemo, just seal up all the individual contents and you’ll be good to go.” A reasonable way of thinking, but it overlooks a big issue – when you need a first aid kit, theres a pretty good chance you’re under stress, your hands might be a little shaky, and you may only have one hand to work with since your other arm/hand might be injured. So, sealing things up in a manner that required two hands to open (or requires several repeated pouch-opening-procedures) might not be conducive to effective use of your gear.
Now, I rather like the Maxpedition FR pouch. It’s reasonably compact, fairly easy to organize, and has several methods for attachment to other gear. I’d hate to give it up. So, to me, the choices are two: a) individually seal the contents of the kit or b) put the whole kit into a waterproof container of some sort.
I’m leaning towards ‘A’. Best method? Well, there’s this:
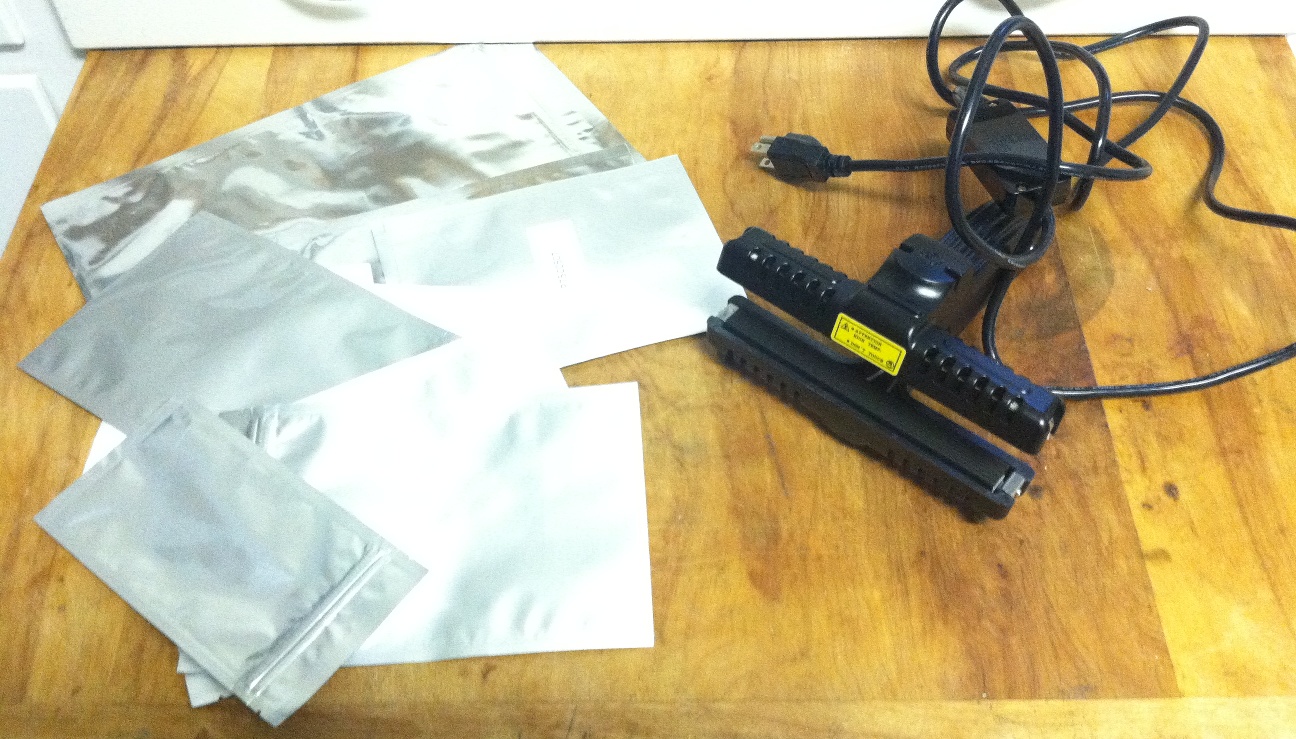 Those are heavy-duty mylar bags with ‘tear away’ tops and zip-seals, and a 6″ heat sealer that I picked up off Amazon. The bags, in various sizes and thicknesses, are from Sorbent Systems. I got them expressly for the purpose of making small, weatherproof, resealable, firs-aid kits for my hunting and outdoors gear. For example:
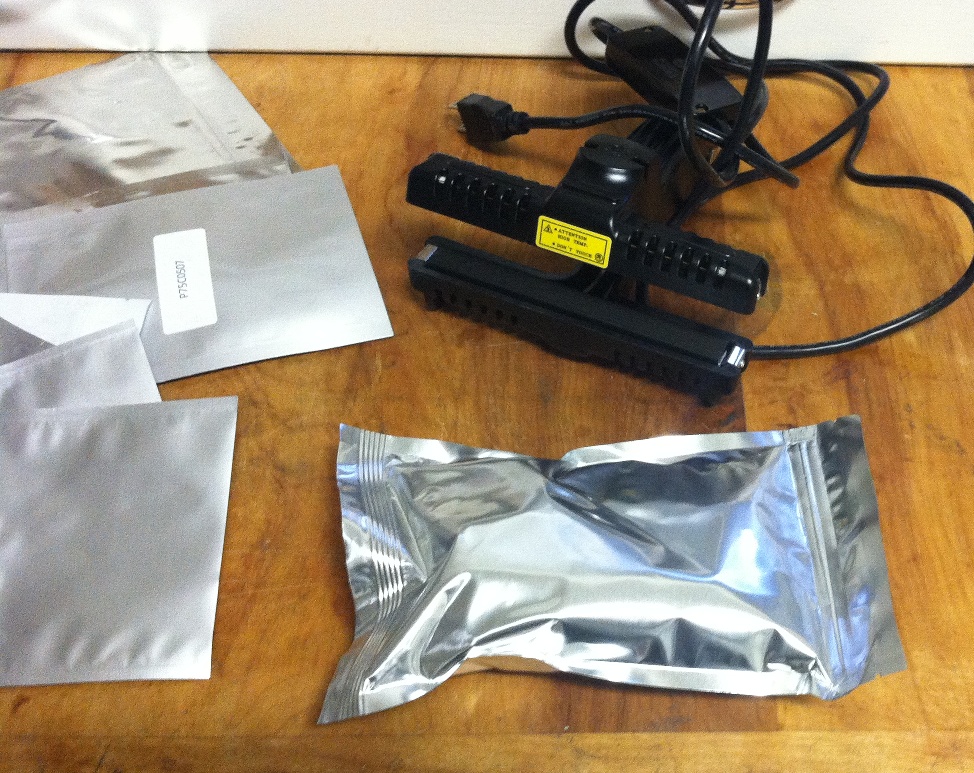 That pouch contains most of the important stuff…gauze, non-stick pads, compress bandage, antibiotic ointment, bandaids, aspirin, tape, etc, etc. Not enough to do surgery or fix a detached aorta, but for the cuts, burns, scrapes and bloody messes that sometimes happen from bicycle accidents, knife slips, falls in blowdown snag, etc, its pretty good. And, it is now completely waterproof. Tear open at the upper corner there with your teeth and open it like a bag of chips. When done, you can reseal it with the ziploc-type closure. When the crisis is over, since I have a stack of these bags, I can simply transfer the contents to a new bag to seal. I’ll wind up getting a larger back, drop the Maxpedition FR into it, throw in a few oxygen absorbers to snug it up tight, and tuck it into my bike bag.
Now, if you have a vacuum sealer, you can very much accomplish a similar setup using your sealer and bags. Two big differences though: the mylar pouches pictured have a ‘tear notch’ to allow easy access (which a vacuum sealed bag does not); and the mylar pouch, in this heavy thickness, is much more puncture resistant than a vacuum seal bag (however, you can always wrap the vacuum seal bag in something to protect its integrity).
I have learned my lesson and won’t be leaving this gear outside over the winter again, but walking around in a solid rain for a few hours would have probably induced the same amount of moisture into things. Waterproofing/weatherproofing an important bit of gear like this makes sense. Fortunately, today I noticed it because I was thinking I should probably check to see how the gear fared over the winter…it would have been a different story if I was a couple miles down the road, sitting on a rock, trying to bandage a gash in my leg with wet and moldy 4″ gauze and pads.
Hooded OD Space Blankets reduced to $10.01
Two posts I want to remind you about: Heavily Armed nature Hike and more importantly, this followup.
The hooded, pocketed, olive-drab, “blanket” has been rather heavily discounted at Amazon. Knocked down from $18 to $10. Get ’em while they’re cheap. Excellent for use as intended, but also good for expedient waterproof overhead cover, dry spot to sit your ass, etc, etc. Far superior than those stupid, flimsy mylar foil sheets. Heres the link:
The fact that all the other colors are still around $19 and the Olive is reduced to $10 makes me think they’re closing ’em out and discontinuing ’em. Feel free to send me a couple off my wish list. (Although, really, even if you don’t wanna throw one my way you should still get a few for yourself…useful, cheap, and well-made….a trifecta you don’t hit very often.)
ETA: Hmmm. Someone musta cleaned ’em out because they arent showing up anymore at that price or in single-serving quantity. Further examination shows the blue ones are available at an equally good price. (Grabber Outdoors Original Space Brand All Weather Blanket: Blue)
Remington 870 Dimple Removal
You know ’em, you love ’em…its the Remington 870 shotgun. A fine scattergun that is so widely represented in this country that you’d have to look pretty hard to find a police department that didn’t have them as the ‘standard’ shotgun. Reasonably affordable, well built, and the target of a huge accessory market, pretty much every survivalist has one. (Although, to be fair, Mossberg’s 500 series is probably an extremely close second-place finisher in this.)
A standard accessory that most folks drop onto their 870 is a magazine tube extension. After all, no one ever had a sudden violent emergency and thought ‘man, I wish I had one or two less shells in this thing.’ It used to be that adding a magazine extension was as simple as unscrew magazine endcap, remove old spring and follower, drop in follower and new spring, screw extension onto end of magazine tube…done. Unfortunately, a while back, the guys at Remington, for whatever reason, added two ‘dimples’ in the magazine tube. If you add a magazine extension, the dimples will keep the follower from traveling past those dimples.
Thus, if you want to add an extended magazine to your 870, and your mag tube has those dimples, you’re going to have to remove them. There are two methods for doing this:
- ‘Press out’ the dimples. This is often done by shoving a socket (from a socket wrench set) of apprpriate diameter down the magazine tube and using it as an anvil to press out the dimples with a c-clamp or hammer. Sometimes it works, sometimes it doesn’t, and sometimes you have a hell of a time removing that socket from the magazine tube.
- Drill out the dimples. Easy, fast, and usually trouble free.
Today, I went with option #2 . (By the way, you can Google ‘remove 870 dimples’ and get a buncha videos on either process.)
First step, unload shotgun, make sure its unloaded, unload it some more, and then, finally, make sure it’s unloaded.
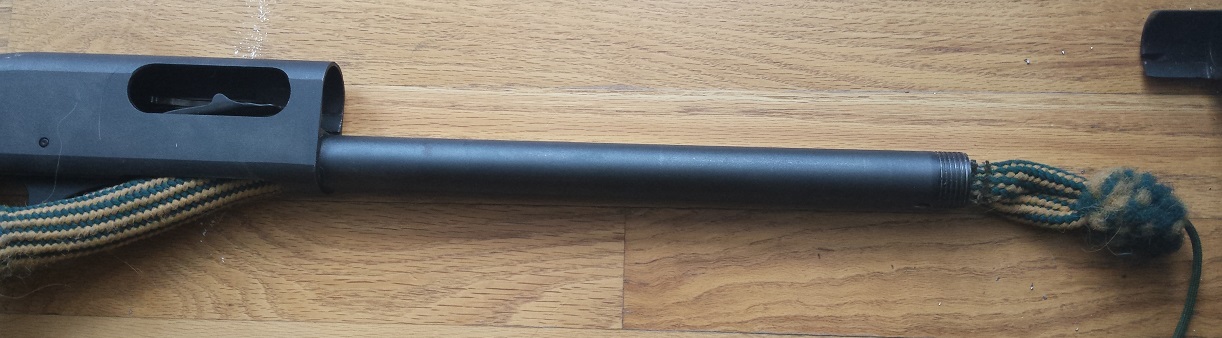
Next up, remove barrel and forend. Easy peasy.
Behold the offending dimples:
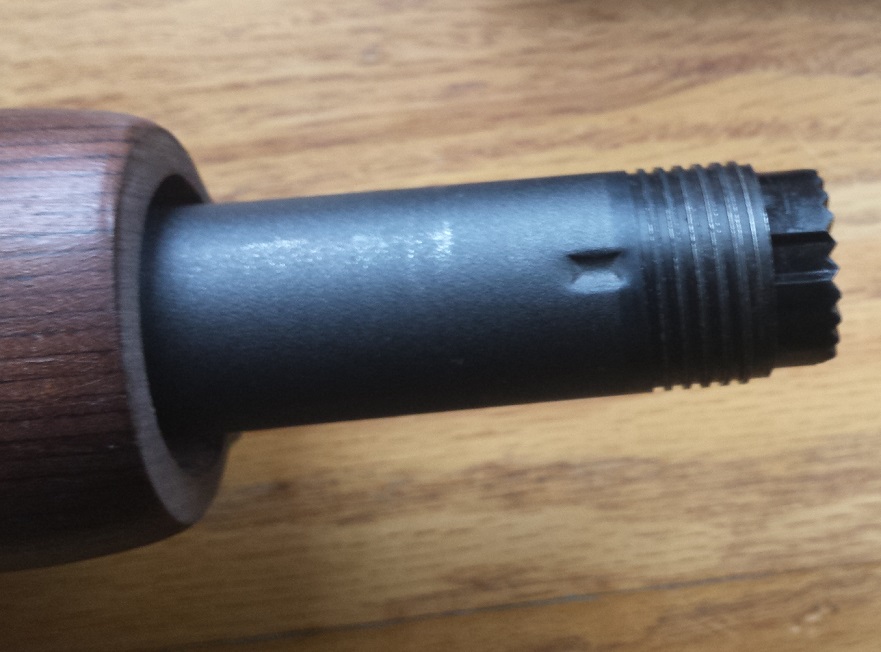
The hated dimple. It’s like some sort of Schumer-Feinstein Speed Bump keeping an otherwise good shotgun from becoming a better shotgun.
The goal is to remove the whole bloody thing. For that, you’ll need a good size drill bit capable of easily and smoothly drilling metal.
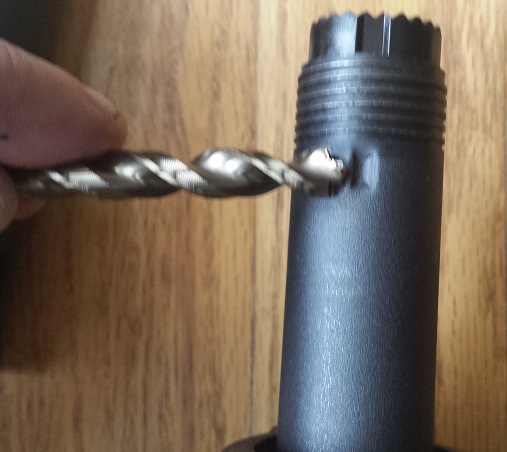
In this case, a 5/16″ bit, centered on the dimple, should be wide enough to do the job.
It’s a good bit easier to have someone else hold the gun steady while you get all drilltastic on it, but, if you have no choice, you can do the job solo.
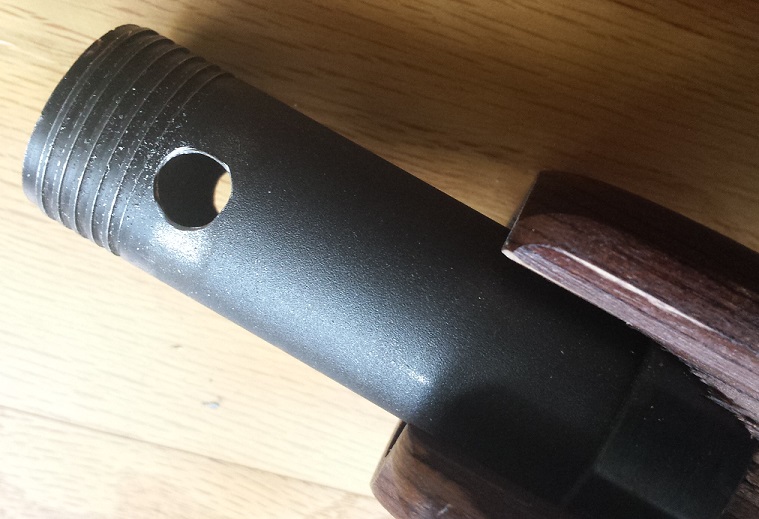 Don’t be an idiot….drill through one dimple, then flip the gun over, and drill the other one. Don’t just drill straight through.
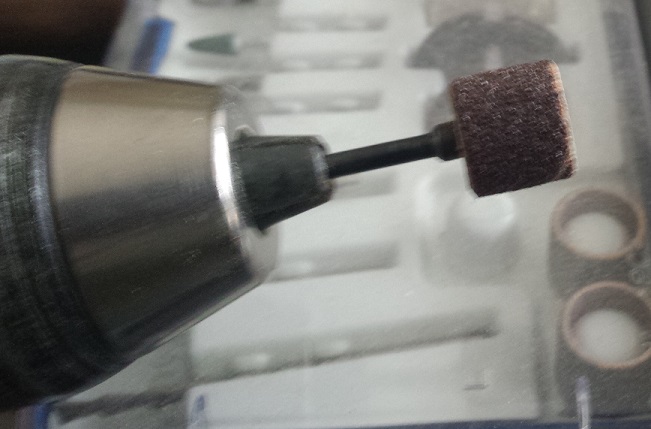
Now, once the drilling is done, you’ve still got some work ahead of you. That magazine follower needs to slide up and down that magazine tube like Sasha Grey on a Vegas stripper pole. So…you’re going to have to polish the inside of the magazine tube where you drilled the holes to make sure there are no rough edges or anything that will snag the magazine follower. There are a couple ways to do this…here’s the easiest. Go grab your Dremel set (aka ‘The Gunsmiths Friend’) and pull out one of those sanding/polishing drums. The holes you drilled aren’t so far down the magazine that you can’t reach them with the Dremel. I already had my drill out so I just chucked the Dremel bit into the drill.
 Spin it up, get in there, and start polishing. You want to remove any jagged bit of metal from the drilling process. You want absolutely no jagged edge, lip, or raised metal from where the drill bit passed through the metal. You can’t really overpolish things, so go to far rather than not far enough.
When finished, I ran a 12 ga. BoreSnake through the mag tube a bunch of times to make sure any debris was removed.
12 ga. BoreSnake to make sure debris is removed. Will also snag on any obvious jagged edges you missed.
A word about followers. This is the crappy, lightweight, flimsy, plastic, OEM follower Remington sent this shotgun out into the world with. Let’s not sugarcoat it…its a POS.
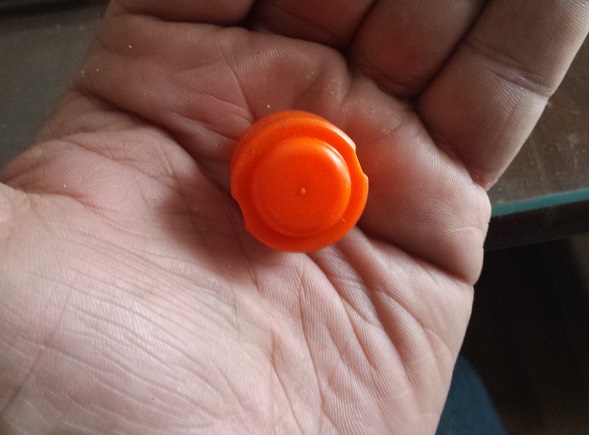
Has the overall quality feel of the little plastic patio table that keeps the box lid off your pizza cheese. Doesn’t instill much confidence.
Other than it being a good, bright color it has nothing going for it. Oh, I’m sure it will work but I want something with some ruggedness, some heft, some substance.
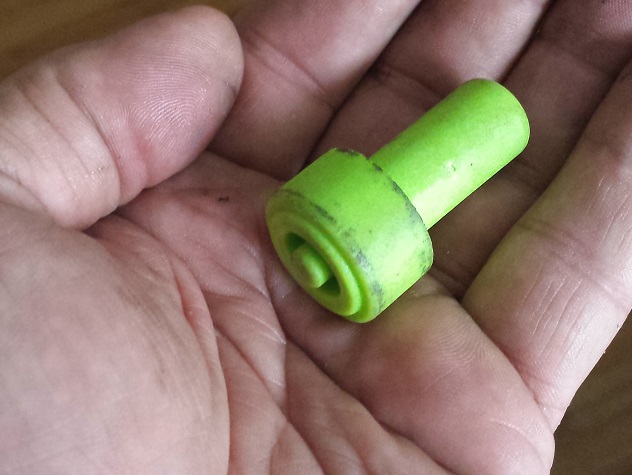
From Wilson Combat. Still plastic, but much more solid.
Wilson Combat 870 follower. There are some others out there, including stainless steel ones, but I’m comfortable with this one. Some followers have grooves to accommodate the dimples (so they claim). I don’t trust them. I’m sure there is a way the follower can rotate slightly in the magazine tube and then have the grooves not line up with dimples. You’re welcome to put your faith in them, but I’ll settle for a dimple-less mag tube and the peace of mind it brings.
So, once you have the drilled holes polished and smooth on the inside of the magazine tube it’s time to put the gun back together. I’m not going to tell you how..if you got it apart, you should be able to get it back together….if not, plenty of videos on YouTube to show you how.
The next thing, which I should hope you would find obvious, is to test the thing. Go get some dummy shotgun shells and load up the magazine. Cycle through all the shells. When the gun is empty the follower should be visible to show you that the gun is empty.
 If the gun has ejected all the shells and you don’t see the follower, that means it is hung up in the tube. Take everything apart and get back to polishing. Also, check the follower for sharp edges as well. I slightly rounded the edges on mine just make sure it would run smoothly up and down the tube. Don’t neglect this function testing. When you’re done with the function test, do it again. And again. I do it about a dozen times because you really can’t have too much confidence in your firearms. When its done, load up the shotgun with your dummy shells and let it sit for a few days, then do the function check a few times again and make sure everything is fine. Once you’re satisfied, go to the range and shoot a case of cheap shells through it to give it a final function check.
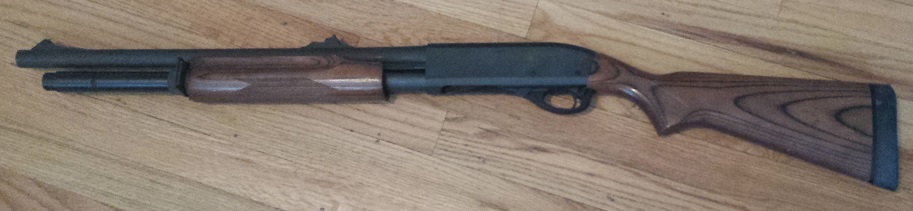
The finished product, exorcised of the dimples. Ready for whatever life throws at it. (Although, realistically, I need to get a rear sling swivel on there.
If you’re buying a used 870, check to see if it has the dimples. There are millions of ’em out there that don’t and if its a choice between two used 870’s, equal in all respects except for the dimples, I’d buy the one without.
Do a pair of holes in the mag tube pose a risk of dirt getting in there? Well, certainly more risk than if the holes weren‘t there. However, the only time the holes are uncovered are when you actually cycle the action of the gun. The rest of the time they are covered by the forend. Honestly, I see it as a non-issue unless I drop the 870 in a sandbox or something.
There you have it – how to remove Remington 870 magazine dimples. Assuming you have a power drill and nothing else, you’ll need:
- 5/16″ drill bit – about $3.00 for a good one
- Dremel polishing/sanding drum – probably five bucks
- 12 ga. BoreSnake – $12 but you should already have one of these anyway
Armed with this knowledge, I urge you to go forth and eliminate the dimples wherever you may find them…until our great nation is again a nation of undimpled Remington 870’s. So say we all.
10/22 mag prefs
If you had to pick one .22 rifle as ‘the survivalists .22 rifle’ it would be highly unlikely that anyone would strongly disagree with the choice of the Ruger 10/22. Having been around for around fifty years, pretty much everyone makes accessories for the gun and if there’s a gun shop out there that doesn’t carry 10/22 rifles or accessories, I haven’t seen it.
Problem is,as with just about any semiauto, some mags are good and some are crap. My experiences have been that there are a handful of good magazines out there and plenty of bad ones.
For an amazing amount of time, Ruger only offered the 10-rd mag for the 10/22. Thats fine, theyre really really good mags. But, they are limited to ten rounds and sometimes you just dont feel like swapping mags all the time. Ruger eventually introduced some 25-round factory mags but, interestingly, they have a mixed reputation….a very rare case of a factory mag not being as good as the aftermarket mag.
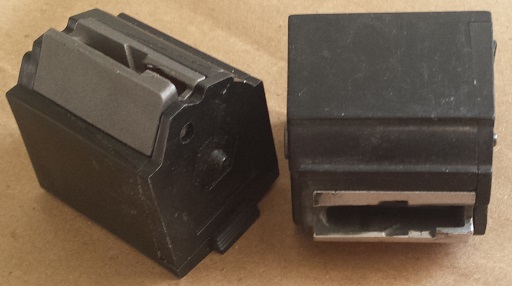
If your needs can be met with a 10-rd mag, the factory Ruger 10/22 mag is pretty much the best and only way to go. These mags are several years old.
For aftermarket Ruger 10/22 mags its pretty hard to go bad with the Butler Creek stuff. Sure, your mileage may vary, but my experience has been almost uniformly positive. The Butler Creek mags come in two flavors: Hot Lips and Steel Lips. The Hot Lips are mags with plastic feed lips and the Steel Lips are the mags with…well, you can figure out.
Back in ’94 I grabbed as many Hot Lip mags as I could and used them for the next ten years, as Slick Willie’s repulsive ‘Assault Weapons Ban’ made making new mags holding ten rounds a crime (unless, of course, those mags were for the cops or military…in which case they had to be marked as such.)
So, for ten years I had about a dozen Hot Lips mags to use. They held up quite well but they eventually started having problems. But, it was a good opportunity to learn just how much life you could get out of a $15 magazine before it needed replacement. The answer, it seems, is about ten years.
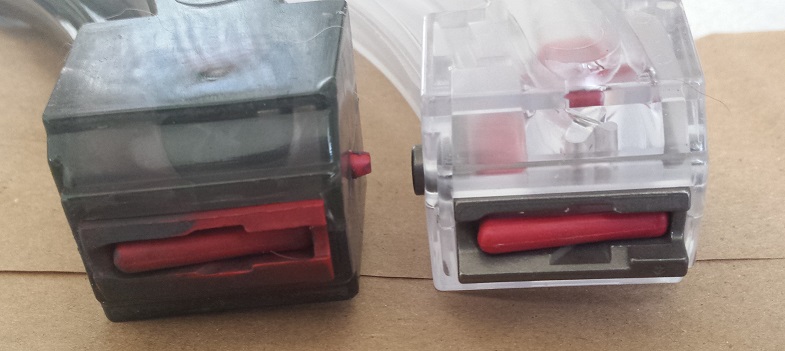
Ca. pre-1994 Butler Creek Hot Lips mag on left, new Butler Creek Steel Lip mag on right. Note the plastic feedlips on the Hot Lips mag showing wear and fraying from years of use.
The Steel Lips magazines, obviously, were a good bit more durable in the feed lip department than the Hot Lips mags. They charge a bit more for the Steel Lips magazines but I’m of the opinion that it is very much worth it. I still sock away the Hot Lips mags, but if I come across a good deal on the Steel Lips I’ll go ahead and get as many of them as I can.
Now that Ruger has re-introduced their Charger 10/22, and brought out the American Rimfire, both of which take the 10/22 magazine so it’s really not a bad idea to get the most durable mag possible. Ten years of regular usage showed that the plastic Hot Lips mags could serve well, but I think in the future I’ll be socking away the Steel Lips more than the Hot Lips.
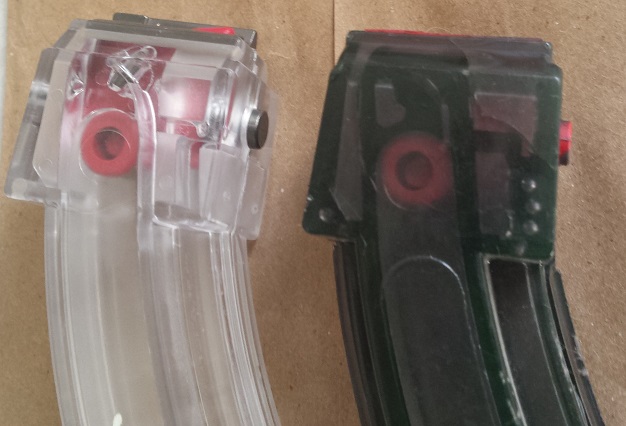
New BC Steel Lip mag (L.), pre-1994 Hot Lips mag on right shows signs of wear and age from being used frequently during 1994-2004. Mag still functions but it best saved for ‘range use’ or non-critical usage. A replacement is about eight bucks….for now.
The only other aftermarket non-BC mag for the 10/22 I’ve found that was any good are the Eagle brand mags. These are also a plastic-lip mag but they can usually be found in bulk at bargain prices…sometimes around $5-6 ea. They’re good for using at the range and otherwise taking the pressure off of your stash of Butler Creek mags…but for packing away a rifle, case of ammo, and a dozen mags, I’ll stick with the Butler Creek mags.
The best sources I’ve found for deals on the BC mags are either CDNN, MGE, or GAS. You 9or your dealer) will have to subscribe for their email specials but usually once or twice a year they’ll have specials on the 10/22 mags. When they do, don’t cheap out and buy five….get as many as you can afford. They’ll always have a good value and if there’s another magazineban they’ll really be worth their weight in silver.
For carrying magazines, there’s a couple outfits that make single-pouch mags that ride on your belt and, if you don’t mind looking a little like Carl Spackler, there are some chest rigs out there as well. When the gophers are about to overrun your position, and the haze is too thick for air support, a rig like that might save you from being pounded into the dust by thousands of tiny feet.

“License to kill gophers by the government of the United Nations. Man, free to kill gophers at will. To kill, you must know your enemy, and in this case my enemy is a varmint. And a varmint will never quit – ever. They’re like the Viet Cong – Varmint Cong. So you have to fall back on superior intelligence and superior firepower. And that’s all she wrote…” -Carl Spackler
So, just my two cents worth, but if you’re gonna go with the 10/22 for most of your .22 rifle needs you’d be doing the smart thing to go heavy on the Butler Creek mags.
Trying the new Gen III ECWS
Bloody cold today. Actually, it’s not that cold…it’s simply what its pretty much supposed to be in Montana around this time of year. Currently? +3, although I expect below zero as the night progresses.
Since it was so cold during the day today, I figured I’d try out a new piece of cold weather gear. See, usually I wear my heavy Carhart coat in this sort of weather. It does a decent job, and its tough as nails, but it’s pretty bulky. I picked up a Gen III ECWS parka a few months back and this has been my first chance to try it out and I’m very pleased with it. Like most cold weather gear, it helps if you dress properly underneath it – you cant just put it on over a t-shirt and expect to be toasty.
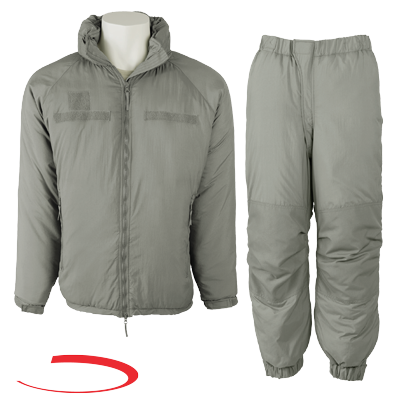 One nice thing, right off the bat, is the compressability….the Carhart coat cant be stuffed down into a small(er) package the way this thing can. I was out this evening walking Nuke and I was wearing the parka over a longsleeve ‘waffle’ pullover and a ECWCS undershirt (which I recommend highly for its warmth and low bulk. Buy ’em cheap by the dozen on eBay) and was warm and comfy. I suspect I’ll troll eBay and pick up two or three extras for myself and one or two for the missus.
Not all military surplus lives up to the hype, but I have to say that thus far I’ve been pretty pleased with it. If you’re hunting for something warm but not overbearingly heavy/bulky you might wanna check these things out.